Straw Bale Planting Instructions & Techniques
There are many ways to take best advantage of your Straw bale planting efforts, including plant support, protection from insects, early growth and even the numbers of vegetables you can grow to each bale.
There is virtually no limit to the variety of vegetables that can be grown using this system, the main one being your particular location and what is traditionally able to grow due to climatic considerations.
The chart below lists the approximate times for the vegetables planted to reach the harvest stage, and how many of each plant you can comfortably plant in one bale.
Bear in mind that you are able to grow plants closer than you would in a traditional garden layout, owing to the nutrient value and other considerations peculiar to SB gardening.
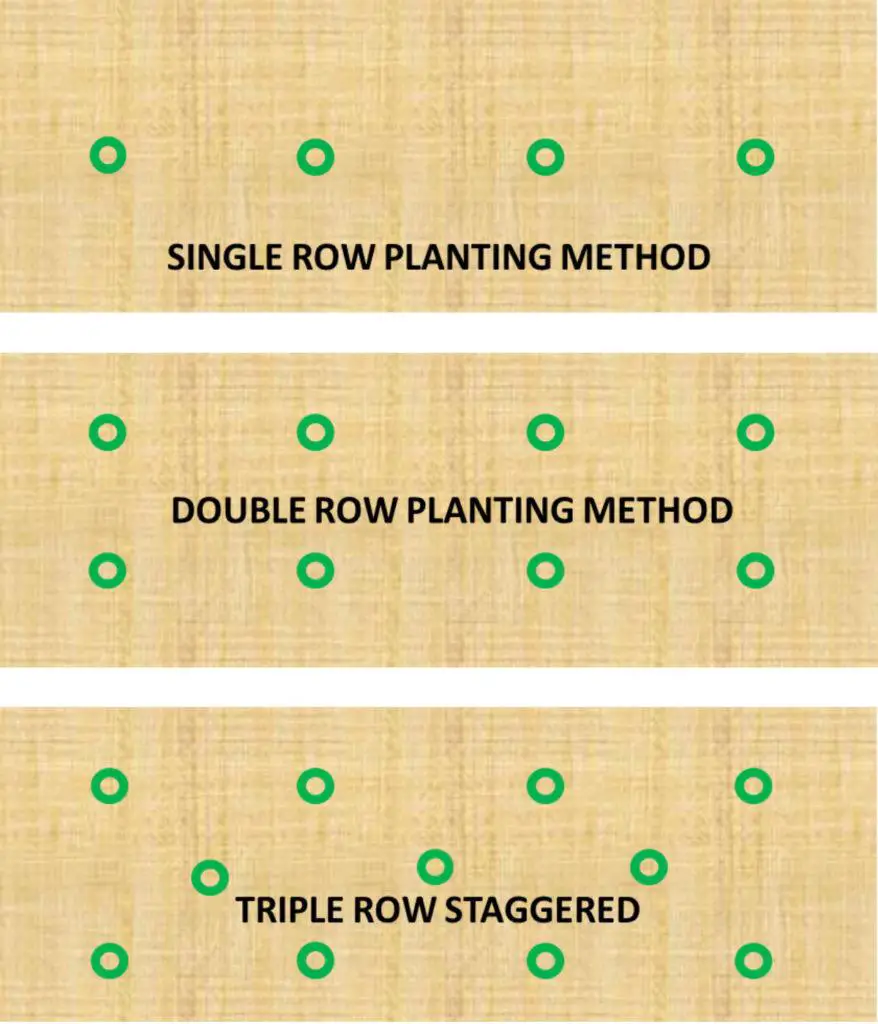
In the following chart, numbers must be regarded as approximate as it very much depends on whether you are planting one row up the centre, or two rows, or even 2 staggered rows – diagrams to follow.
| Plants | Approx Days to Harvest | No Per Bale |
| BROCCOLI | 85-110 | 6 |
| BEETS | 50-70 | 15-20 |
| BEANS (pole) | 70-80 | 8-12 |
| BRUSSELS SPROUTS | 85-100 | 6 |
| CABBAGE | 90-100 | 6 |
| CAULIFLOWER | 85-110 | 6 |
| CARROT | 70 | 25-30 |
| CUCUMBER | 55 | 4-6 |
| EGGPLANT (Aubergine) | 110-120 | 3 |
| GARLIC | 90-100 | 16 |
| LETTUCE | 40-80 | 8-12 |
| LEEK | 100-125 | 35-40 |
| ONIONS | 95-110 | 16 |
| PARSNIPS | 95-110 | 25-30 |
| PEAS | 70-80 | 8-12 |
| PEPPERS | 70-80 | 4 |
| POTATO | 80-100 | 3 |
| STRAWBERRY | 60-90 | 4 |
| SCALLION (Spring Onion) | 60-70 | 16 |
| SQUASH | 85-90 | 3 |
| TOMATOES | 70-75 | 3 |
| ZUCCHINI (courgette) | 80 | 3 |
Carrots and parsnips especially, need a special mention here as they must be grown from seed – transplanting rarely works with these particular roots.

When planting these vegetables, instead of the method described for planting seeds try this method.
When the bale is ready, run a trowel or something similar down the bale in 2 or 3 rows lengthwise, to a depth of 9-12 inches forcing the straw aside as you go.
Part with your hand to create a trench the full length, then fill this with good potting compost. Sprinkle on your seeds sparingly then water.
As the plants grow to about 2-3 inches, trim between them with a pair of sharp scissors to cause the least disturbance to the roots, leaving a gap of about 3 inches between the plants.
These next diagrams give an idea of the different choices available to you when it comes to planting out your vegetables.
These pictures are how your bale could look like when viewed from above, and show patterns for planting young plants.
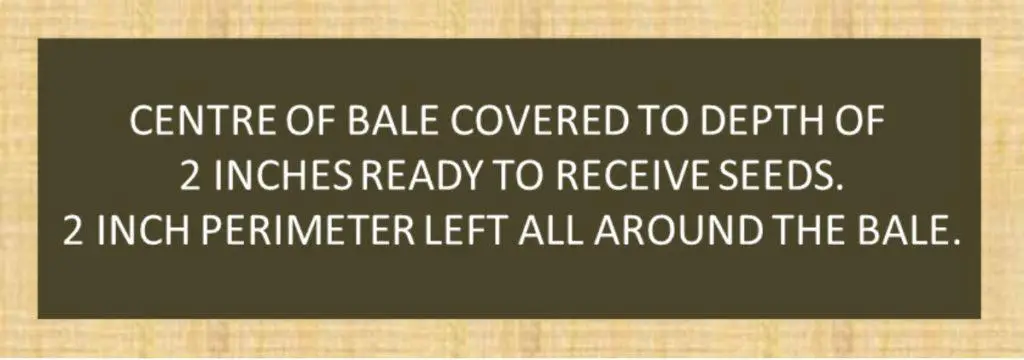
The following diagram shows a bale laid out for planting from seed (other than carrots and parsnips).
Straw Bale Plant Support:
Of course many varieties of fruits and vegetables need support of some kind, and this is certainly the case with growing in straw – especially as the bale itself starts to deteriorate.
Thankfully this is not a difficult task with straw, and indeed this technique has some advantages over traditional growing methods.
There are several ways to go about this, from wires strung between posts, to growing up a fence or wall using canes, wires or netting – wire or nylon.
The following diagrams give some ideas as to supporting or protecting your plants incorporating the unique assets of the Straw Bale system.
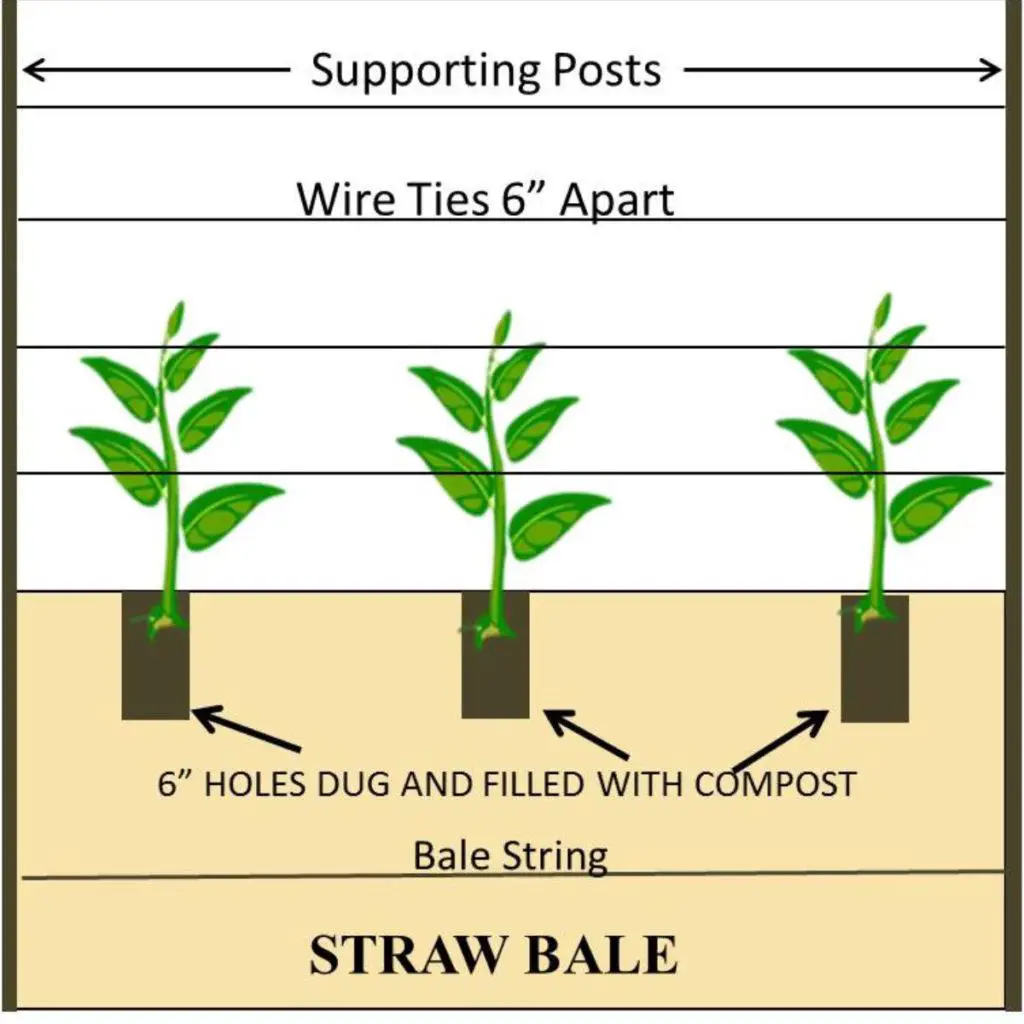
In the picture above you will see one example of a very effective support system. The posts are hammered into the ground at each end of the bale, then connected along the top with a 3 x 1 inch timber strap or similar.
This top brace will keep the frame rigid as you add tension to the wires between the posts, upon which your climbing plants will grow.
Instead of wire strung horizontally between the posts, you can instead use vertical canes, or indeed 4 inch wire sheep-mesh – especially good for climbing beans or peas.
The advantage the horizontal wire system has though, is that you can easily throw polythene or insect mesh over the wire throughout the growing process; pull it down and tuck it under the strings along the side of the straw bale.
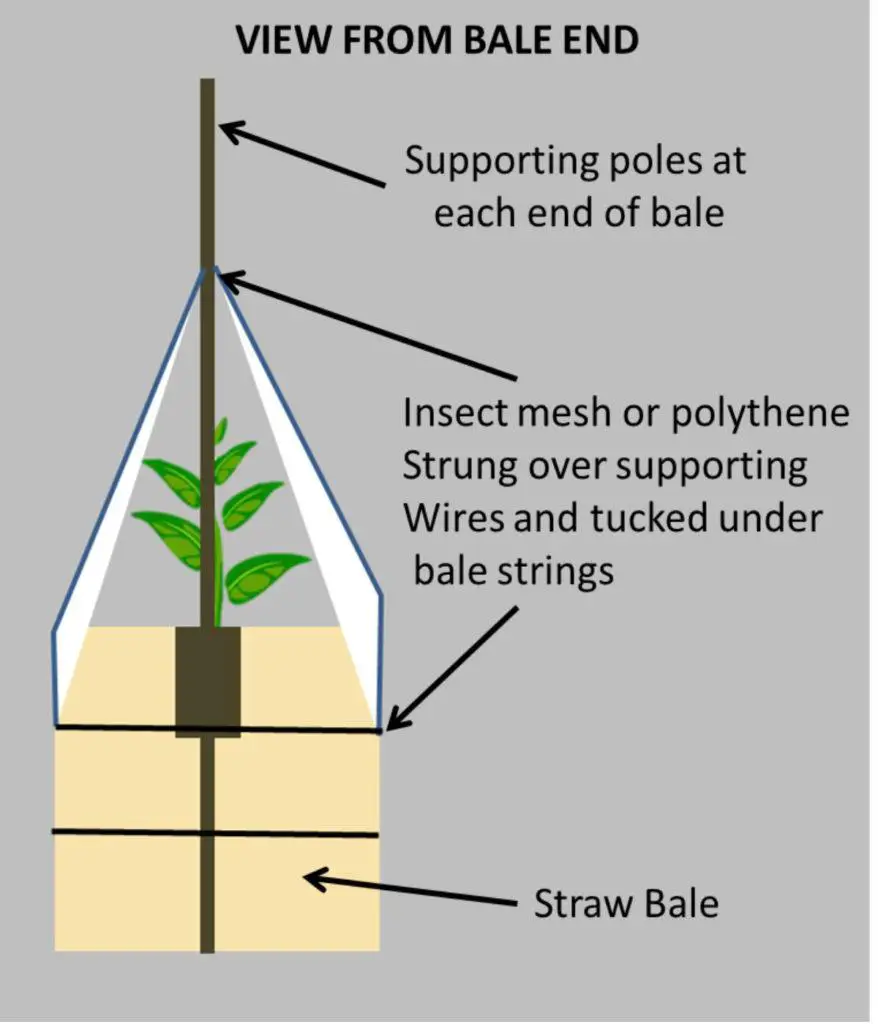
This forms an extremely effective cold-frame for early growth, or an equally effective insect barrier against the dreaded cabbage moth for instance!
With regard to how many bales you can put end-to-end with this method, I find that 2-3 bales is about best. More than this puts a strain on the wire and posts, and generally makes things a bit less manageable.
However if you would like a number of bales to form your SBG then that is no problem. It is a simple matter to form open-ended squares or even longer rows of bales as long as the supporting posts and wires are sufficient to hold everything in place.
Watering The Straw Bale Garden:
Water, either the wastage of it or the general supply of it, can be a major issue for some folks for a variety of reasons. And for sure it is a good thing to preserve such a valuable resource whenever we can. Growing in straw can use up a considerable amount of water in some hot dry climates, and so it pays to look at ways to reduce this usage as much as we can while at the same time not jeopardising our planting efforts.
Fortunately there is an easy solution if you feel that the SB is using up too much water, or indeed drying out too quickly – wrap the bale in cling-film!
Yes, by simply rolling out some kitchen cling-film around the bale 2 or 3 times, you will not only prevent the bale drying out, but also help in the composting action of nature to break down the bale itself – thereby feeding your plants.
This is a method you may often see around farms, as they wrap the round bales in industrial-grade cling-film to create silage for winter animal feed. Any polythene will do though, as the aim is simply to prevent or at least reduce evaporation. Weed-suppressant fabric wrapped around the bale will also help prevent water loss.
Encasing the bales in timber, brick, corrugated iron sheeting, or anything else you may have handy will all help in this respect.
Finally, be sure that you are making the most of nature’s supply. Keep water butts connected to any down-pipes you may have on your house or outbuildings, and store the water for using on your straw.
As mentioned in earlier chapters, this water will give you better results with regard to crop yield than treated tap water will.
Alternative Straw Bale Layouts:
Apart from growing vegetables within the SB itself, a combination of ‘both worlds’ means that you can increase your vegetable production.
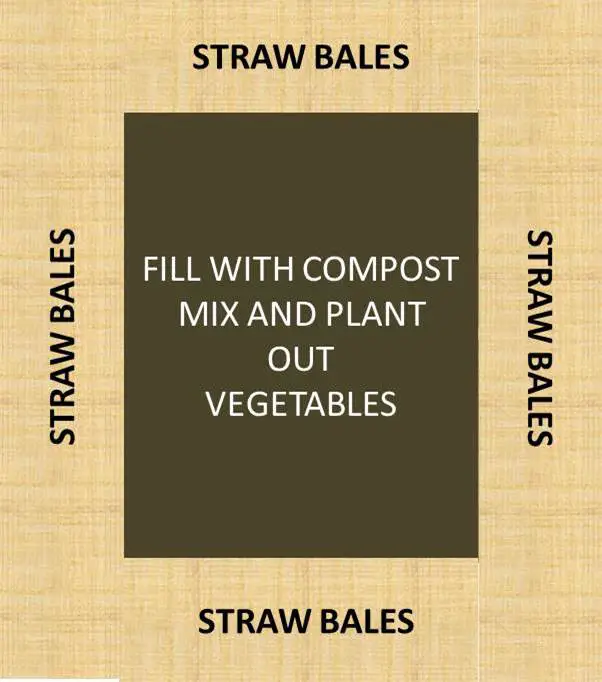
This is simply achieved by taking a number of bales and forming them into a square with an open centre. Fill in the centre with good compost – not topsoil as this is likely to compact – and plant out both the bales and the centre with vegetables.
Make sure that you can reach the centre of your construction in order to harvest your produce. This usually means that a reach from the side of your bales should not exceed 3 feet to the centre. The straw itself acts as an excellent insulator, often meaning that you can grow vegetables more suited to warmer climates in this centre-growing arrangement.
Use your imagination! There are numerous different ways in which you can place your bales to best effect, and indeed many different ways to protect your plants or create climbing areas – or both!
Bale covered with weld-wire for plants to grow on.
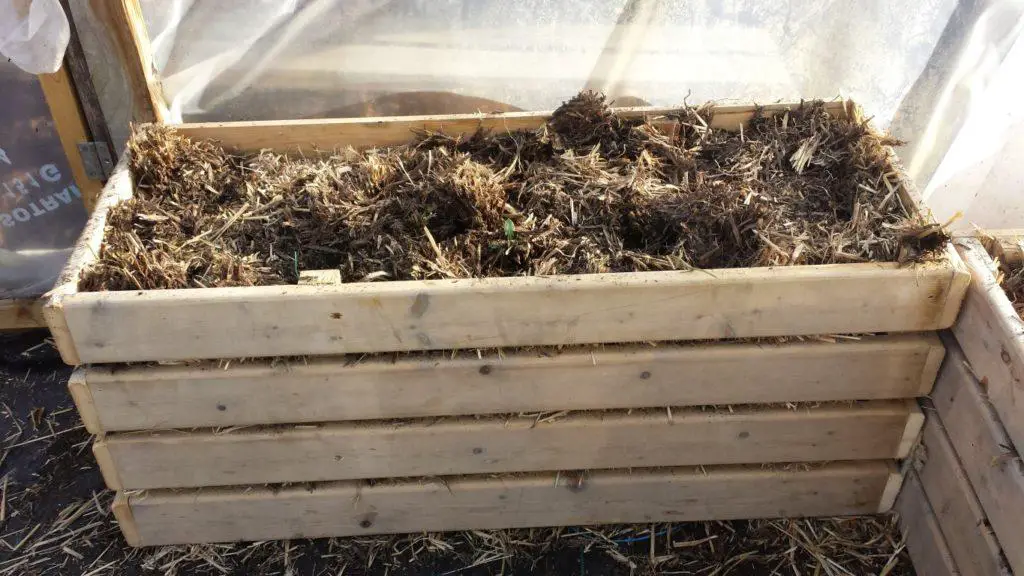
An alternative but similar option is to construct a Raised Bed Garden to the dimensions of the straw, and use the bales themselves for infill instead of filling with your expensive soil mix.
For instance if you construct a framework 8 foot long by 18/24 inches high, by 36 inches wide. This would accommodate 4 bales neatly. (Double check your local bales sizes just to be sure before construction!)
The sides of the ‘box’ do not have to solid in the same way as a traditional Raised Bed, as there is no soil to fall out. This means that you can use less timber, which again reduces overall cost.
You can go even further with a little imagination and construct a good looking framework that would make an excellent piece of patio furniture as well as a good talking point with friends and family.
Need more? If you add a timber base to the frame, then attach some wheels, you can have a mobile Raised Bed SBG!
This can be a fantastic addition, as one of the other benefits includes the ability to wheel it around to follow the sun! I would however only recommend this on a smaller single bale construction.
Some Choice Vegetables To Grow:
Now that you have all the information you need to start your very own SB Garden project. Here are some vegetables you may well consider growing.
Although these instructions are aimed at traditional growing practices, the requirements regarding your SB vegetables are pretty much the same, with some minor modifications.
Armed with the information in the previous chapters and with a little imagination, all of these vegetables can be grown very successfully in an SB garden.
Crops such as potatoes, carrots and parsnips do require some ‘special care’ when it comes to growing in straw. This is mentioned in more detail either in the previous chapter on ‘Planting out the bale’ or as in the case of potatoes, in the relevant chapter following.
Bear in mind that all these vegetable crops can in effect be grown slightly earlier than indicated for the traditional planting methods. This is due to the fact that the SB itself is well insulated against the cold weather, and is not so much subject to ground temperatures.
Also some of the issues mentioned in the following notes involving pests such as the cutworm and other soil-dwelling critters, thankfully are not a problem when growing in straw.
The general information regarding plant care, storing, and harvesting tips to follow is useful to know no matter what gardening technique you employ.
Top Ten Straw Bale Veggies
There are of course many hundreds of different vegetables you can grow yourself, depending on factors such as your location, growing outside or in a hothouse, or indeed what you personally like or prefer to grow.
For the beginner to vegetable gardening however, here are my top ten vegetables to try out and get the general feel for growing your own veggies. Laid out alphabetically rather than in any other order, they are as follows..
Beets:
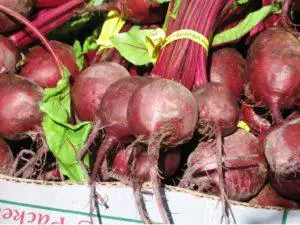
Beets are a good choice for gardeners in Northern climates as they grow well in the cooler conditions. An excellent long-season crop as they are even able to survive frosty temperatures. Will prosper well in high phosphorous levels, but high nitrogen may result in excessive leafiness and small bulbs. For this reason it is not a good crop to grow in the same ground that legumes such as peas and beans have just vacated.
Planting: Seeds can be planted indoors to give an early start, about 1-2 inches apart and ½ inch deep, but wait until soil reaches 50 degrees if sowing outdoors.
If temperature allows, planting can begin late March/April and continue until late in the season. Plantings can be spaced around 20 days apart to allow for Beets throughout the growing season.
A good crop for late – even winter crops in zone 9 or above.
Planting in straw can be done either by seed on a bed of compost mix (as described in earlier chapters), or planted as seedlings direct into the prepared bale. As described in earlier chapters.
Plant Care: Thin out the plants when they reach about 2 inches high by pinching them off at the base, or snip with shears so not to disturb the ground. Leave a gap of around 3-4 inches between plants. Beets are prone to rise out of the ground when in the early stages of growth, making them prone to the predations of slugs and other insects, so it is best to press the young beets carefully back down into the ground again until the root system is properly established.
Harvesting: Beets are usually ready for harvesting in 50-70 days, though they can be harvested any time after the bulb appears. They can be left longer but will become tougher as they grow, and slightly woody.
A highly nutritious and tasty part of the beetroot plant is the leaves, they are also delicious and make a good addition to salad dishes if picked before they get old and tough.
Beets can be stored for many months as long as you have a dry cool dry place. After lifting the beets, remove any dirt and let the skins dry before storing. Beets can also be pickled, frozen or canned to preserve them.
Bell Peppers:
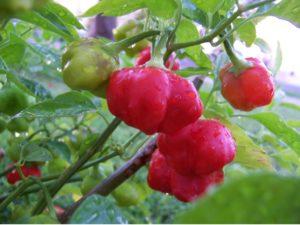
Second only to tomatoes as a garden favourite, Peppers come in many shapes, colours and sizes, hot or sweet – and modern-day chefs would be lost without them! A simple plant to grow if you have warm enough conditions (average 70 degrees F.) Bell Peppers are a great addition to your vegetable garden or greenhouse.
Planting: Peppers will not survive in ground temperatures below 65 degrees F. So if you want to grow them outdoors this is the minimum requirement; in cooler climates it is best to grow in a greenhouse environment.
Seeds should be grown about 3-4 to a pot and the weakest discarded, before transplanting the healthy plants to your outdoor growing area (if you are able to grow them outdoors) after the spring frosts are well clear.
They should be planted about 18 inches apart, in rows about two feet apart. Placing a cardboard collar (try the toilet roll insert when the paper is finished!) around the stem of the plant, sunk about an inch into the soil, will protect against stem cutworms.
They are particularly susceptible to root shock if the ground temperature is below 60 degrees F. This can stunt the growth for several weeks so must be taken into consideration before planting out. Peppers have to be supported with canes or some other support such as nylon garden mesh.
Planting into straw is usually best done with young seedlings direct into the bale as described earlier.
Plant Care: This is a thirsty plant so be sure to water regularly especially if you live an exceptional hot dry climate.
Make sure the fruits are properly supported and that the plant is not struggling under the weight.Care has to be taken when weeding around the base of the plants as this can easily damage the shallow root system. Watch out for Aphids and Flea beetles and blossom-end rot – which occurs when calcium is low – usually because of irregular or insufficient watering practices.
They are particularly prone to root rot if there is standing water around the stem, so good drainage is essential to maintain a healthy plant.
Harvesting: Unlike some other vegetables that grow tougher as they age on the plant; Peppers grow in sweetness and flavour the longer you allow them to grow, and increase in their vitamin C content.Remove the peppers by snipping the pepper stem, rather than tearing or breaking it from the plant.
Peppers will store in a fridge for 7-10 days in a plastic bag, or they can be sliced and frozen.
Cabbage:
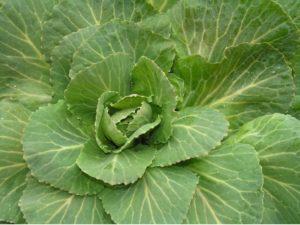
Cabbage is a popular vegetable with many varieties, offering opportunities for many different growing conditions and taste preferences. Rich in iron, it likes cool temperatures and so is ideal for cooler Northern climates where it is best planted early spring and fall.
Planting: For an early start to the season, begin by planting seeds indoors about 8 weeks before the last spring frost. The young plants can then be transplanted into your prepared area about two weeks or so before the last of the spring frosts.
During this time protect the seedlings under a cloche or some garden fleece, particularly in the cold evenings, until they are fully established and the cooler weather has gone.
Plant Care: Young plants especially have to be protected from the predations of pigeons and rabbits, who will simply decimate your plants in short time if allowed! Garden fleece can be used to good effect in this matter – especially against the pigeons or cabbage butterfly. More robust measures such as rabbit mesh will maybe have to be employed against rabbits however.
Caterpillars from the cabbage butterfly, along with aphids and other insects love a bit of cabbage! Check out the section on Organic Pest Control to see how to discourage them from your cabbage patch.
Harvesting: When the cabbage has formed a suitably firm head then it is ready for harvesting – usually in about 65 days or so. Remove the mature cabbage by cutting at the base of the head, but leave the stem planted along with the outer leaves. The plant will then send up fresh shoots to form new heads.
Leave just 3 or 4 of these heads to develop and they will form miniature cabbages in just a few weeks.
To store your cabbage head, make sure it is not wet to the touch, before wrapping in cling-film and storing in a cool place for no more than two weeks.
Carrots:
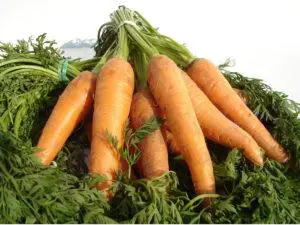
As it is for growing any vegetables, knowing how to grow carrots properly can save a lot of grief and heartache when it comes to harvest time.
Carrots in particular are prone to a pest called the carrot fly (Chamaepsila rosae). This is a destructive pest also known to attack parsnips and celery, and so must be looked out for. That aside, growing carrots is not at all difficult if certain preparations are made that can ensure a good healthy crop of delicious fresh carrots for the table.
Just like onions, carrots are a chef’s favourite as they can be included in a multitude of different dishes, and so are counted in the ‘must have’ vegetables in all the top restaurant kitchens. Being rich in vitamin A and calcium, carrots are delicious, steamed, boiled, and even roasted with a honey and orange glaze!
Ground conditions: Carrots prefer a light sandy soil and preferably a situation where they can get most of the days sunshine; though they can stand a little shade, particularly in hotter climates. They must also be grown in soil that is free from stones, if you are to avoid the ‘clubbing’ effect that means the carrots grow all twisted and miss-shaped.
For this reason I always prefer to grow carrots in a raised bed, as it is easier to tend, and the soil can be better controlled to produce a sandy light soil, free from stones, that the growing carrots love.
Planting seed: Once the soil or growing medium is prepared, then it is time to plant the carrot seed. This is a simple process that involves making a very shallow groove in the soil, and sprinkling the carrot seeds along the groove quite sparingly. Seed is then lightly covered up with soil. If planting before late march then they are best covered with a polythene cloche to encourage growth.
Rows should be approx. 6 inches apart. Shortly after the carrots have germinated, and have grown 2-3 inches in height; I would start to carefully thin out the plants to about 4 inches apart. To help avoid the dreaded carrot fly, be very careful with this process, causing as little disturbance as possible to the remaining plants. A handy tip would be to trim away the foliage of the seedlings you do not want, just below the surface.
For planting carrots in a Straw bale please refer to the previous page ‘Planting Tips & Techniques.’
Avoiding the carrot fly:
To begin with, after thinning remove all remaining foliage away from the carrot patch, as this will just attract the carrot fly.
Carrot fly is the carrots worst enemy by far. It is attracted to the smell of the carrot foliage, and from there descends to lay it’s eggs at the base of the foliage where it meets the soil. It is the larva of the carrot fly that does the damage, by burrowing into the top of the carrot. First signs will be the leaves of the plant turning yellow, and the plant dying.
There is unfortunately no cure as yet for carrot fly devastation, but fortunately there are preventative measures you can take. First of all is to keep in mind that carrot fly are low flying insects. For this reason it is best to grow the carrots in a raised bed if possible, about 18 inches (450mm) off the ground or more is preferred.
(It is worth noting here that as the SBitself is 18 inches high, carrot fly is not so much of a problem as it would be under normal growing conditions.)
Next tip is to cover the plants with a fleece material to prevent the fly’s from landing and laying their eggs on the carrots. Try growing Allium plants such as garlic or chives, to help disguise the smell of the carrots and distract the fly from the growing carrots.
Harvesting/Storing: From about July onwards, you now have a successful carrot crop to harvest – hopefully ! Mostly you just need to harvest the carrots as they are needed.
However they can be stored by cutting off the foliage with sharp scissors about 1 inch above the carrot, then placing on a bed of dry sand, in a garden shed. Make sure the carrots do not touch, and inspect regularly to make sure there are none rotting.
This way the carrots can be kept fresh and wholesome over the winter months, but make sure they are kept frost-free and lightly covered over with sacking or some similar material. Knowing these basics of how to grow carrots should help ensure a healthy crop.