Onions In Straw Bales – Now’s The Time To Consider Planting Them Out!
Finally the ‘warmer’ weather is beginning to creep up on us, and if you are a keen gardener then you’re probably just itching to get the veggie plot started 🙂
Yes, admittedly here in Scotland it is still a bit on the nippy side with frost still making an early morning appearance. However if you are catching on to the ‘growing’ (like what I did there!) trend of planting in straw bales , then you can consider getting things in motion right now.
One of the reasons for this is that the straw bales themselves being well insulated against the cold, allows for slightly earlier planting out. That and the fact that the heating up process that takes place during priming, means an earlier stating point for planting.
Check out this post for more information on preparing your bales. However that being said, as soon as the ‘babies’ start to show their heads I would have some protective garden fleese on hand to cover them for the first few weeks against the risk of a hard frost.
Planting Onions in Straw Bales
So. Onions. This is a great early crop to consider as onions are able to withstand a mild frost just fine – in fact reccomended. Planting them out in the straw bales is simple and will only take a few minutes of your precious time.
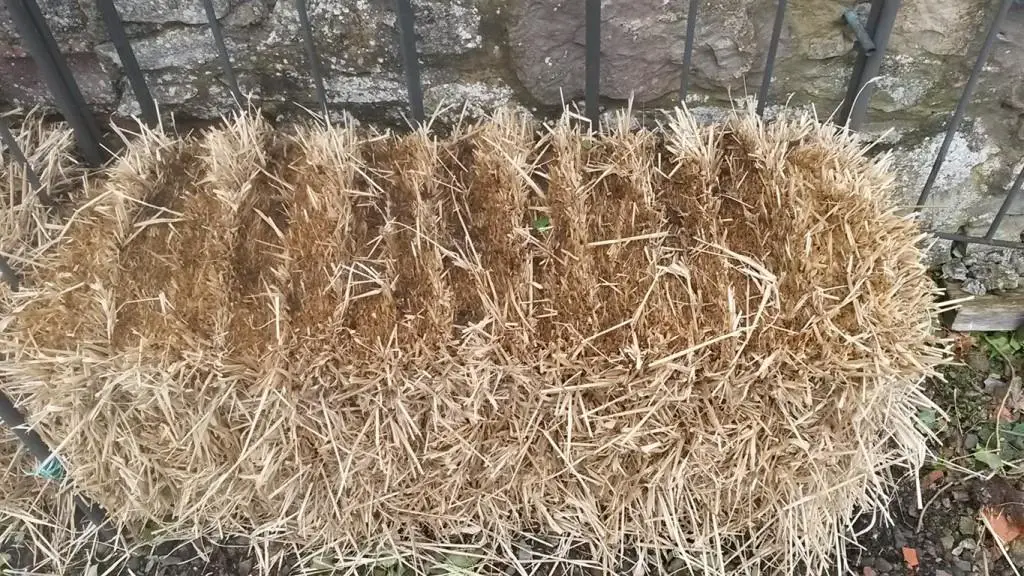
The picture above shows the bale of straw (not hay bale) after being primed for ten days or so. This means that it is ready to recieve its crop of onion sets.
Before proceeding simply snip along the top surface of the bale to remove the worst of the ‘sticky-up’ bits of straw. This just makes it easier to lay out the compost base for your onion sets to be planted in.
The growing medium in this case is 50/50 sand to compost. Simply lay out a layer about 2 inches (50mm) thick on top of the bale, keeping it about 2 inches from each edge as in the picture below. Flatten it out with a builders trowel or something suitable just to level off the surface.

Once this is done you simply poke the onion sets into the compost, spacing them about 3-4 inches apart. By following the pattern in the picture above you should get about 24 onions to a bale.
Here I have set out two bales at right angle to one another as they form part of a larger pattern. One of the bales as you can see is partially wrapped in cling-film. This is just to give an example of what you can do if you are concerned about moisture loss from the bale. This is especially if you live in a hot dry region.
Bear in mind that with this type of no-dig gardening, similar to growing vegetables in Raised Beds, plants are able to be grown closer together than in a traditional vegetable garden. This is due to several factors but the two main ones are nutrition and space.
The growing medium of the bale and compost is highly nutritional, and the onions are not competing with weeds for nutrients. There is no space needed between the onions sets for this very reason also – which all means that they can be grown closer together.
The cling-film (you can use landscape fabric or black polythene also), helps to retain moisture. It also helps with the composting process within the bale.
Back to the onions. Sorry the picture is not the best, however you should be able to see that I have planted a mix of white (Stuttgarter Giant) and red (Red Arrow) onions. Care is VERY simple for onions.
They do not have many insect predators so need little protection against creepy-crawlies. However…Onion fly maggots can cause problems, so covering the growing onions with fleece or fine mesh may be a good idea if they are a problem in your area.
Watch out for crows, pigeons, and magpies. These pests will pull the young onion sets out of the soil just for the hell of it 🙂
Also be prepared to gently push them back into the compost again as their roots start to grow, pushing them up and out! Once the roots have established themselves properly then its all good – harvest when the leaves begin to turn yellow by lifting and leaving on the soil or straw bale surface for a few days to dry out before storing in a cool dry area.
For complete instruction on how to set out your straw bale garden, then please click on this link for full instructions FREE, on how to go about getting the best from your very own straw bale garden.
You may also be interested – in Keyhole Gardening