Growing potatoes – The basics

Potatoes are perhaps the best vegetable to begin with if you are a new gardener, or if you have limited experience of growing vegetables, growing potatoes included. The reason is that potatoes grow in many types of soil conditions, and are fairly hardy against the weather, but do prefer cooler conditions. Once the potato shaws are through, they soon grow to block out any sunlight around their roots, which means that there is seldom any need to weed them, except in the most extreme of conditions – perhaps where the plot had not been properly weeded.
There can be few things more satisfying to a gardener, than digging up the potatoes at the end of the growing season. The reward for all your labours suddenly comes to the surface, it’s a bit like a treasure hunt really – except that this is a treasure that you have planted, and are now getting it back with interest !
As well as knowing how to grow potatoes, you must know what kind of potatoes to grow. There are many different varieties of potatoes, some for baking, some for mashing. Potatoes that make the best fries etc etc. First rule though, especially to start with, is to find out just what varieties grow best in your area. The easy way to determine this is to go to a local supplier (not a large chain) as they will most probably stock the best varieties of potatoes for your specific region.
You must start with buying seed potatoes that are specifically reared for the purpose. You could just plant potatoes from the supermarket, however this is not such a good idea as they may have been sprayed with chemicals to prevent sprouting whilst in the shop for sale. You can in fact just plant potato peelings, if you are really stuck. As long as the potato peelings have an eye on them, they will grow – quite amazing really. I know I have in the past produced potatoes just from the peelings, though not the best crop – it is nevertheless possible, if you are on a very tight budget for instance.
Preparing Seed Potatoes
The seed potatoes will often have begun to sprout, before you even get them out of the bag; this is a good thing. If not, then cover them over with a sack or generally keep them in a dark cool place for a few days, until they have sprouted even an inch or so. This is a process called potato chitting and means that they are ready for planting.
Growing seed potatoes – Preparing the ground
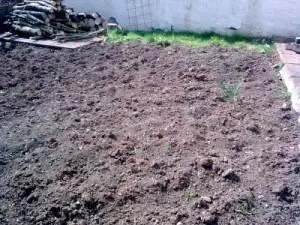
Ground preparation for growing potatoes, is fairly straight forward. In fact potatoes are an excellent first crop where perhaps nothing has been cultivated before, as they are good for breaking up the ground. The soil just has to be dug over, preferably at the end of the previous growing season; and then raked out to pick up the worst of the stones and weeds.
This is a problem that does not exist if you grow potatoes in a barrel or sack. You can find out how on this page.
Planting

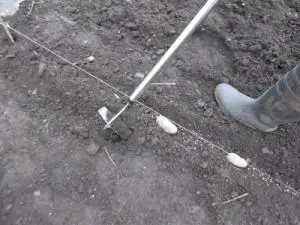
When this is done, then simply string out a straight line, as a guide. Then run the corner of your Dutch hoe along the line to create a shallow groove. To this you can add a sprinkling of ‘grow more’ or general fertilizer, before placing the seed potatoes about 10 inches (250mm) apart along the groove.
Continue this procedure keeping the lines about 24-30 ins (600-750mm) apart, to allow for the next stage.
Place the potatoes shoot side up in the groove. It is often said to break away some of the shoots and just leave one or two, personally I don’t bother with that and just place them as they come. It doesn’t seem to affect my potato harvest either way.
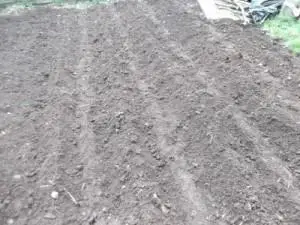
When this is done, then pick up the Dutch hoe again and lift the soil, first along one side, and then the other. This will form a mound along the length of the track, in which the potatoes will grow.
Some people I know, avoid this step and just place the potatoes in the ground without forming drills along the line of the crop. In my view this is the lazy man’s way out, and is a mistake as it will lead to a crop that is more difficult to harvest, resulting in broken potatoes. It will also mean a poorer harvest in terms of the potatoes produced.
Back to creating the drills. After the first lift, then you wait until she shaws present themselves through the earth for a couple of inches. Go over the drills again with the Dutch hoe, and lift the soil to cover the new growth.
Conclusion:

That’s it, job done! As the potatoes grow then water them if need be, and look out for any predations of any kind. All being well then you can look forward to a harvest of great fresh grown potatoes in the Autumn.
One word of caution is to look out for the signs of potato blight. This is a virus that can sometimes attach and destroy your crop, and usually takes effect just before harvest time. The signs of potato blight is a sudden yellowing of the leaves, which soon begin to rot and fall over.
This is a disease that starts in the leaves and goes down into the tuber itself. Rather than try to prevent this happening, which is very difficult. I often harvest the entire crop before the disease has time to infect the potato. Ok, the potatoes may not have grown to their fullest potential, but at least I will have a partial crop of good healthy spuds.
An easy way to tell if it is to late, is to cut one of the tubers in half. You will see a dark vein throughout the tuber itself. If this is the case then simply dump them – not in the compost tip though, as the virus can remain in the soil for years.
If you try and store potatoes that have the potato blight in them, you will find that they will rot down to a smelly mush – really does spoil your day if you reach into a bag for your potatoes and you sink wrist deep into a rotting spud – Arrgggg.

