How To Grow Vegetables in Hay or Straw Bales:
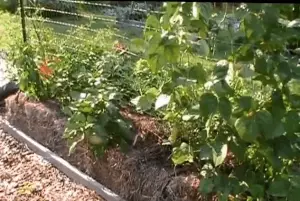
Straw bale or Hay bale gardening are really types of Container, or perhaps Raised Bed gardening idea’s, that are certainly growing in popularity as gardeners wake up to the new easy-gardening ‘revolution’ that is taking place today.
There are many explanations for this interest in small vegetable gardening ideas, but I suspect that it is mainly to do with the hectic lifestyle for many people who are trying to juggle work-time, while providing healthy food for the family.
As for growing plants in hay bales, city dwellers in particular, whilst being continually bombarded by the need to ‘be organic’ and provide fresh chemical-free vegetables for the kids, are opting for this gardening technique as they simply do not have access to the land needed to grow their own vegetables.
Bales of Straw or hay take up very little space!
Thankfully many city municipalities have made areas available such as vacant parking lots, or land destined to be built upon sometime in the future but lying unused till then. Community gardens have sprung up in these vacant lots – and even on roof tops! using Raised Bed gardening techniques to great effect.
This not only provides fresh vegetables, but also encourages a real community spirit amongst those involved. You could in fact say that the benefits of such gardening enterprises are not only physical in terms of exercise and food produced, but also play a great part in the mental or emotional health of the participants.
Growing Potatoes In Hay Bales
With all that said as a kind of introduction, what exactly are the benefits involved with either hay bale or straw bale gardening?
Growing potatoes in hay instead of straw bales can be very productive indeed, but there are a few things that must be taken into consideration before planting potatoes in hay bales.
I have listed a few of those below, as well as a comparison between Hay and Straw bales.
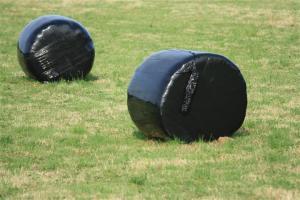
Hay Bales are usually made up from a mixture of clover and grasses that has been allowed to grow to a certain height, then harvested and formed into bales.
Used in farms as winter feed for the animals as it is highly nutritious, especially when mixed with molasses and sealed into large plastic ‘bales’ where it matures over the late Autumn.
This stinks to high heaven – but the cattle love it!
What are straw bales made from?
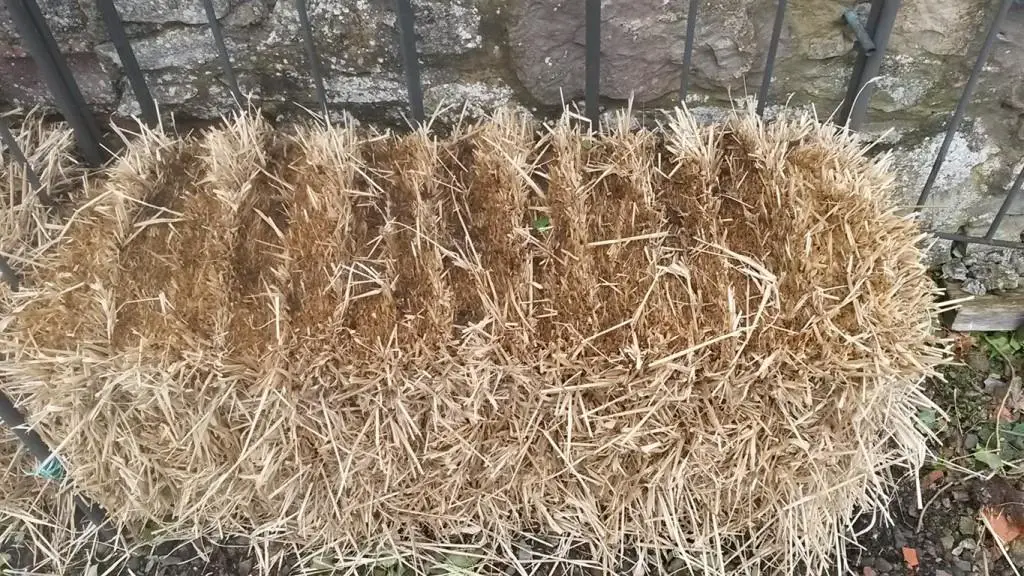
Straw Bales are formed mainly from the stalks of grain-bearing wheat, barley, oats, rye and rice. This is allowed to dry in the field before baling and is used for bedding farm animals, cows, pigs, horses and sheep etc – and Straw Bale Gardening!
Other uses are for thatching (especially wheat straw), basket or matt weaving
Hay Bale Advantages For Growing:
The main advantage of the hay bale is that it is the nutrient value. This will of course vary depending on the actual make-up of your hay, but in general terms because you are using grasses and clover, the hay bale is loaded with nitrogen, potash and potassium and many other nutrients needed to grow strong healthy vegetables.
This means that it requires little in the way of fertilizer, at least until the later stages of plant growth or fruiting.
The main disadvantage of the hay bale is the fact that it carries a LOT of grass seeds!
These seeds will of course grow alongside your plants and can mean endless pulling out of weeds, otherwise you will end up with a lovely hay bale lawn!
Now of course, if you are fortunate enough to find out that the hay was harvested before the grass seeds formed, then that would be ideal.
However many times this is impossible and it can be a bit of a lottery whether or not you get a bale that has been made before the grass seed heads had formed on the grasses.
Straw Bale Advantages :
The main advantage of the straw bale is that it offers a ‘blank canvas’ with regard to its make-up, the only nutrient value is in fact carbon. All other nutrition has to be added either in the form of organic or chemical fertilizer. Personally I always use organic, which can be easily added in the form of organic tea’s.
Once the bale actually starts to compost or break-down over the growing season, this lack of nutrients is partially made up by the decomposition process which will in effect turn your straw bale into usable humus.
The main disadvantage as I see it with using Straw bales is in fact this lack of nutrients. As we have seen though, this is easily made up by the addition of nutrients during the process of preparing the bale (more on this later).
Check For Chemical Contamination:
Do check before using either of these techniques that the bales have not been treated with fire-retardant chemicals. This is often the case with bales that have been previously used for public events, school Halloween displays, Christmas manger scenes etc.
The last thing you want is for these chemicals to contaminate your otherwise healthy veggies!
General Advantages Of Bale Gardening:
- 1. No Digging Required. Truly a no-dig gardening concept!
- 2. Weed-free gardening (watch out for those hay bales!)
- 3. Back-ache free gardening. Little bending over required.
- 4. Wheel-chair friendly! The height makes it accessible for users of wheelchairs.
- 5. Slug-free gardening. Slugs are just not keen on the spikey straw surface.
- 6. Cheaper than Raised Beds or containers. Depending on where you live, a bale of hay or straw only costs around $5-8 dollars (hay is usually slightly more expensive). Many times cheaper than filling a Raised Bed system with compost mixture.
- 7. Compact and accessible. Abundant crops through this intensive gardening idea.
- 8. Little space required. Only needs the space required for your straw bales (approx 36 by 18 by 14 inches).
- 9. Straw bales are Ideal for filling deep raised beds!
3 Simple Steps to Growing Your Bale Garden:
Gardening instructions for growing in straw bales and in hay bales, are basically the same with just a little more emphasis on the nutrient priming of the straw bundle.
1. Priming you’re bale. Before planting can begin the bale must be ‘primed ‘ or conditioned. This is required to begin the decomposition process of your bale, and also to infuse the bale with the necessary nutrients to ensure healthy growth. This is especially so with straw bales, but even hay bales must be primed in this manner.
To prime your bales, make sure that after choosing a suitable location you lay the bale on its side with the spikey side facing upwards. This is to allow the water to run inside the tubes and reach the inside of the bale.
Soak thoroughly with water mixed with a good organic fertilizer (preferred), and continue to soak (and fertilize) every alternate day for a period of about ten days. After 14 days or so the bale (which has heated up in the process) should have cooled down, and is now ready to receive your plants.
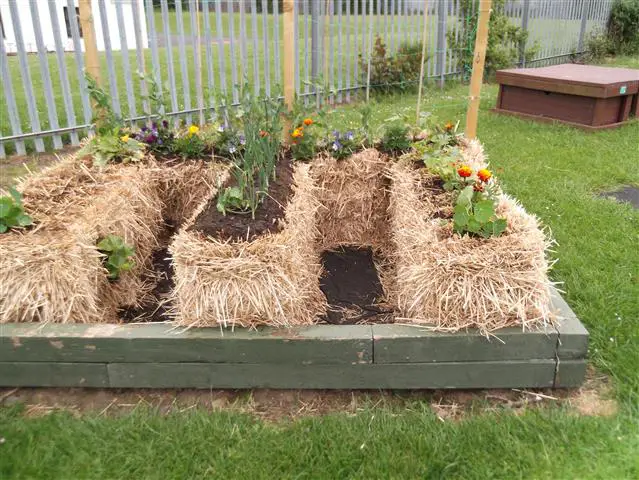
2. Planting you’re vegetables, simply dig out a hole about plant-pot size in the surface of the bail, and insert your seedlings alongside some growing compost.
Bear in mind that vegetable plants can be grown slightly closer together than usual using this technique, as there is no need to hoe weeds!
For growing roots such as carrots the technique changes slightly in that you will create a v-shaped trench along the length of the bale with a trowel. Fill this channel in with compost and then sow your carrot seeds.
To plant from seed then simply cover your bale with 2 inches of growing compost, leaving a space about 2 inches around the edge. Sow your seeds and water as you would normally.
3. Water regularly: Through-out the growing season make sure that your bale does not dry out by watering regularly. Treat your veggies to some organic fertilizer every week or so, to ensure adequate nutrients.
Get ready for an abundant harvest of vegetables!
Like to know more about this amazingly effective gardening technique? Then simply Click on This Link For a fuller more detailed explanation of Straw Bale gardening, including how to plant & grow vegetables such as carrots, parsnips, potatoes and a whole selection of veggies, plus lots of growing tips and instructions on getting the best out of your efforts.

