
What is a Hugelkultur Bed?
A Hugelkultur bed is a raised garden bed built from rotting logs, branches, grass clippings, leaves, and soil. As the wood decomposes, it stores moisture, improves soil fertility, and creates a low-maintenance, self-irrigating, growing area ideal for vegetables, herbs, and no-dig gardening methods.
Pronounced ‘Hoogelkooltoor’ meaning ‘Mound culture‘. Hugelkultur gardening originated in Black Forest area of Germany and Eastern Europe and has become popular with modern gardeners because it reduces watering, improves poor soil, and recycles natural garden waste.
This guide explains exactly how to build a Hugelkultur bed step-by-step, the best wood to use, what vegetables grow best in Hugelkultur systems and common mistakes to avoid.
Step By Step In A Nutshell:
- 1: Determine a good source of material to create your Hugelbed.
- 2: Find a good area to begin construction.
- 3: Start construction with the heaviest logs at the base, smaller twigs as the mound rises.
- 4: Cover over with good quality topsoil to at least 6 inches depth.
- 5: Plant out your new Hugelbed!
Building a Hugelbed – The Details:
Step 1: Material. A Hugel mound requires a fair amount of material, especially if you are aiming at a typical size of around 10-12 foot in length and 6-9 foot in width. The mound itself is around 3 foot high. These measurements do not have to be exact but is an indication only. The materials you will need are.
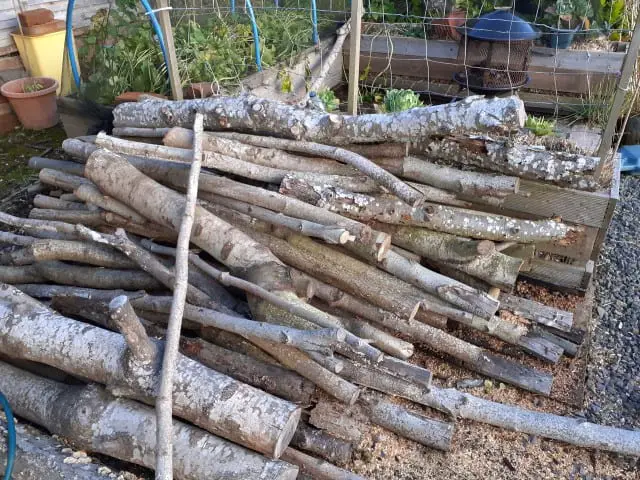
- TIMBERS: This includes heavy timber or lumber for the base materials. This is added to with smaller and smaller twigs until you reach the required height. This can be fallen timbers (preferable) or even new timbers. Softwoods are best as they decompose better/faster than oak for example. Hardwoods like Cedar in particular should be avoided, as it is insect and rot resistant.
- Green Material: I have often seen this part missed out in Hugelbed construction advice – and yet it is super-important. Whilst wood adds ‘brown material’ (See composting for example) and builds bulk and self-irrigation potential. Vegetation such as grass cuttings and other vegetation matter adds ‘green material’. This is essential to add the needed minerals such as nitrogen, potassium and phosphorus, that will allow your plants to thrive.
Step 2: Location. Here are a few things to consider.
- LOCATION: If you have a swale or a dip in the ground that collects water, this could be ideal for your Hugelbed. It uses up an area of ground that would most probably not be used for traditional crops. Consider your climate, and the plants you would like to grow. Whilst a Hugelkultur is famous for being self-irrigating (after a couple of years), this may be put to the test if you place it in full sunshine in Arizona!
- Flat Area? No problem. A Hugelbed can be built virtually anywhere – check out the video for a Hugelbed that I built on a flat grassy area at my sisters orchard.
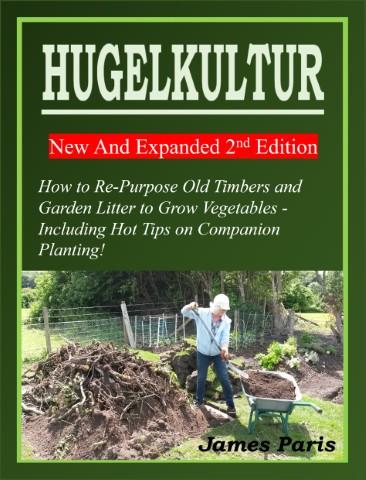
Step 3: Construction: This is where the hard work begins – unless you have a backhoe handy!
- First Step. Once you have cleared out the area you plan on using, simply mark it out and begin by laying the largest timbers or logs at the base. Lay them out lengthways close together. Add the smaller timbers on top and around them until you have a decent mound created.
- 2nd Step. Gather together all the green scraps you can find including grass trimmings, weed cuttings (minus the roots) and any other organic matter such as the manure from horse, chicken, goat, cow or rabbit manure. Go around the mound and push all this material into the empty spaces between the timbers.
- 3rd Step. Cover the completed mound with topsoil making sure it is covered to a depth of at leat 4 inches but better around 8 inches. If you have turfed an area (as in the video) then place the turf upside-down on the mound Before covering with soil – this will add more nutrients and soil as the turf rots down.
- Planting. Simply plant out the vegetables you wish to grow in pretty much the same way as you would on a raised bed, with the exception of root vegetables for the first year. The reason for this is that I have found the first year or 2, the mound is just beginning to ‘settle down’ and be fully productive with regard to composition and mineral balance. Also you may find the soil depth may be a little restrictive for deep tap-root vegetables as the timber beneath has not yet broken down sufficiently.
Common Hugelkultur Mistakes
- Choosing the wrong timber (rot-resistant or treated timber) Avoid cedar or eucalyptus or allelopathic woods like black walnut.
- Not enough depth of topsoil – you need at least 4 inches top covering.
- Making the mound sides too steep so the soil washes away. Ideally it should be about 45 degrees – no more than 60.
- Failing to pack the top soil and green material properly into every crack and crevice between the timbers, resulting in holes forming in the hugelbed as it settles.
- Nitrogen starvation caused by not enough green material added during construction.
How Long Does A Hugelkultur Bed Last?
Perhaps the biggest advantage of a Hugelbed no-dig gardening system is that it lasts for at least 10 years, but more likely 15-20 years if the proper effort has been put in at the beginning. Yes, it can be a lot of physical work to create it – but this will pay you back for maybe a couple of decades!
Frequently Asked Questions
What is the best wood for Hugelkultur?
Partially rotted hardwood logs such as maple, birch, alder, apple, and poplar work best because they absorb moisture and decompose slowly over time.
Can you build a Hugelkultur bed in autumn?
Yes. Autumn is one of the best times to build a Hugelkultur bed because fallen leaves, grass clippings, and garden waste are widely available. The bed also has time to settle before spring planting.
How long does a Hugelkultur bed last?
Most Hugelkultur beds last between 5 and 15 years depending on the size of the logs and the type of wood used.
What should you not put in a Hugelkultur bed?
Avoid treated lumber, black walnut, cedar, and diseased wood because they may inhibit plant growth or introduce toxins.
Does Hugelkultur reduce watering?
Yes. As the buried wood decomposes, it acts like a sponge that stores moisture and slowly releases it back into the soil. This is known as a self watering raised bed system for that reason.
Hugelkultur Video Tutorial
I built this Hugelbed with the help of my sister in only 4 or 5 hours – it was hard graft though!
So how does a Hugelkultur work? Check this link to a complete article on the ‘science’ behind the Hugelkultur technique.
Recent Posts
Making your own planters for growing vegetables is not difficult at all for anyone who has just the basic DIY skills – or who is willing to learn some! In this article I will show a number of...
Packing in soil and organic material to fill the gaps in a Hugelkultur One of several no-dig gardening methods, the Hugelkultur or Hugelbed, is a vegetable growing technique originating from the...