Making composting bins is just 1 of the great uses that discarded pallets can be put to. Indeed the phrase ‘upcycling’ could definitely be used here as the original use for the pallet to move materials quickly and easily, is replaced by using the discarded pallet to create an effective compost bin.
So just exactly how do you ‘upcycle’ old pallets and build your own composter to create a wonderful composting bin?
Thankfully this part is not rocket science, in fact it is so simple that even someone with limited DIY knowledge can assemble a pallet composter in under 1 hour if the materials are to hand.
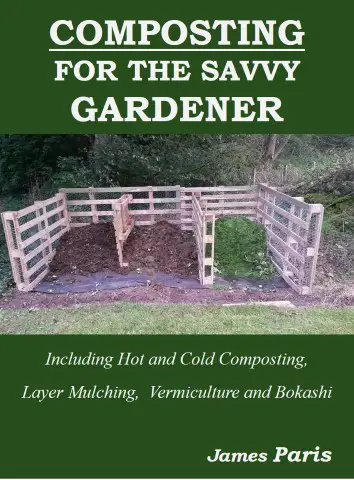
For example I built the 3-bin example in the image below in just 45 minutes, it’s really not that difficult.
What you will need to make a pallet composter:
- 3 or 7 pallets depending on style (more later)
- Screws, nails or cable ties!
- Roll of 1 inch chicken mesh
- 3 inch Fence posts
4 steps to build your composting bin
- Decide on the type of composter. I.E Single bin or triple bin
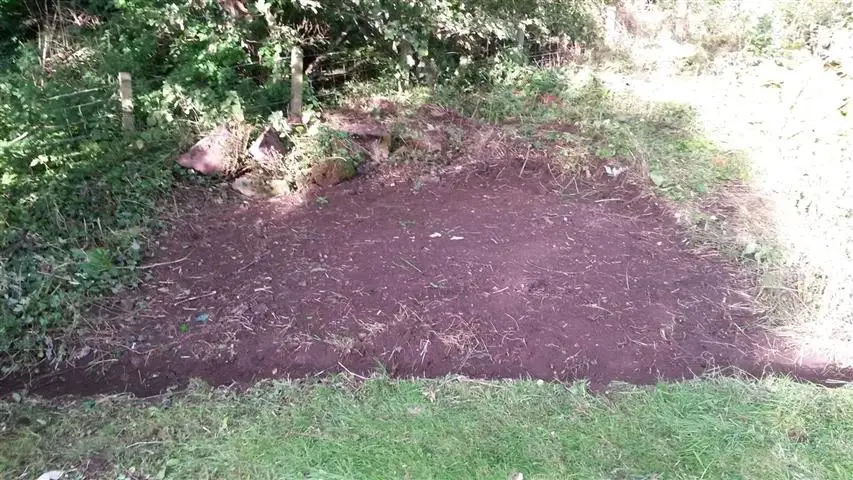
- Level and clear an area just bigger than the bins when assembled
- Fix the pallets together using fixings of choice
- Wrap the whole composter around with 1 inch chicken mesh
Single or triple bay composter
When building a composter you have to decide before-hand if you are going to build a simple single-bin composter or a triple bin composter. The 2 style will of course determine how many pallets you require for the job.
But how to choose?
First of all you have to consider the composting process. Compost is not created overnight, it is a long drawn-out process as the organic material decomposes over months or even years.
True this can be speeded up significantly if using the hot composting methods, which I have done on several occasions, but generally speaking it takes 12-24 months before you have usable compost.
This means that the material you gather over 1 growing season will not be fully developed into compost by the following Spring, which leaves you with a dilemma if you only have the 1 bin – what do you do with the following years compostable organic matter?
If you just pile it on top of the existing material, then you will have to dig down the following year in order to dig it out and use it.
Also, compost has to ‘breath’ in order to break down properly. Piling more stuff on top is not ideal and slows down the process for the material at the bottom.
So there you have the problem with using a single-bay composter.
The triple bay composter works in an entirely more efficient way, basically by using 1 bay each year, with the first bay used acting as a storage for the usable compost that has been formed over the previous years.
This means that I always have a bay for this seasons material because even after 3 years, at the beginning of each growing season, you simply empty the last years bin into the next-door bin, which has in turn already been emptied into the end bin.
So the middle bin always holds material from the previous year, leaving an empty bin at the end for you to fill up over the coming season.
The bin at the opposite end holds the mature composted material that can be used in the garden before you pile on the ‘new’ stuff from the neighbouring middle bin.
Yes, I think I’ve managed to make that sound more complicated than it actually is!
Assembling the pallets to make a composter:
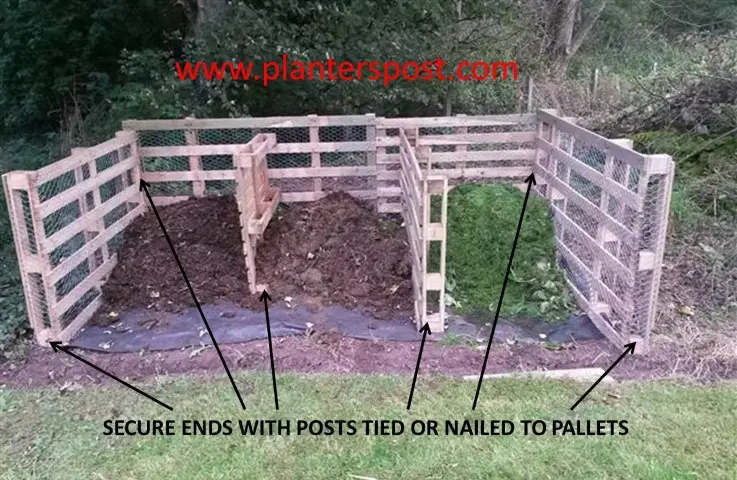
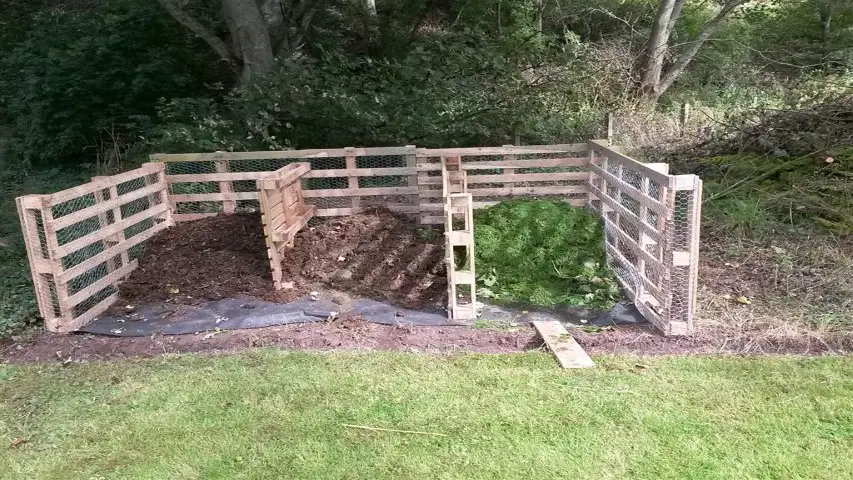
As you will see from the images, I have chosen the triple composer – it just makes more sense overall, and takes a lot more material.
Once the area has been prepared or levelled, you can lay out some weed fabric on the base to stop invasive weeds as an option. In this case I am plagued by stinging nettles so I have opted to do this but it is not essential in most cases.
Chooses pallets the same width and length if you can as it will make life a lot easier when it comes to assembling them together.
As for fixing the pallets together. Nails, screws or even long cable ties will do the job just fine. As long as the structure is fixed at the ends then the rectangular design will in effect hold it upright.
Fixing the chicken mesh around the bins will not only aerate the compost and keep it from falling out between the slats in the pallets, it will also tie the whole thing together.
Adding a front to the compost bins is another option that will enable you to hold more material in the bins, but it is not essential.
At the front sides of the bins, hammer in a fence post to hold this open end. This would mean 4 fence posts – one for each pallet. This will also secure the structure in place.
The jobs a good-un as they say. That’s all there is to creating your very own 3-bin composter that may well last for up to 10 years!
Should compost be covered?
In general, compost has to have water in order to do its thing. A dry compost bin is not going to be effective at all as the material needs to be soaked in order to decompose.
However once the compost has been created, then it is best to cover it over with a water-permeable fabric (weed fabric). This allows enough water to penetrate so that it will keep the finished compost moist, without flooding it and washing away the valuable nutrients.
In the case of a 3-bin composter, the end bin I usually keep covered for just this reason, whilst the other 2 bins are open to the elements.
How to produce good compost
Compost is made up of approximately 3 parts ‘brown’ material to 1 part ‘green’. The brown material gives you the bulk of the compost, whilst the green material supplies the nutrients that the plants need.
Brown material includes: Straw, dry grass, leaf fall or leaf mould, small twigs, shredded paper, shredded cardboard (not gloss or coloured), sawdust, chipped bark, wood ash.
Green material includes: Vegetable cuttings, grass clippings, coffee grounds, animal manure (herbivores only), hedge cuttings, annual weeds without seeds or roots.
Once you have the ingredients together and over the course of the growing season, turn the compost over regularly – at least once per week, in order to speed the process and be sure that enough oxygen get to the centre of the heap.
This will ensure your compost stays healthy and will also speed up the composting process.
Should compost smell?
Mature compost will not smell at all when you pass it by, and when you pick up a handful it should have a rich ‘earthy’ smell. Any smell of rotten eggs means that either you have rotten eggs in the pile (sorry couldn’t resist that) which is caused by the toxic chemical hydrogen sulphide, or that your compost is putrefying and not decomposing.
This ‘rotten eggs’ smell is generally caused by a lack of airflow through the heap and is simply fixed by turning over the compost regularly as described.
Purification or smelly compost can also be caused by adding the wrong materials to the bin.
Things NOT to add to compost include eggs, fish, meat raw or cooked, dairy product of any kind, fat or lard, coal ash, diseased or infected plants. (More in this post)
Not only will these some of these materials cause problems with smells for example. Food materials will also encourage vermin, pests and other scavengers to your compost pile.
Anything that may resemble a food source such as fruit which can be put on the compost, should be buried into it so that it is hidden from view and scent.
The last thing you want to see when taking the wheelbarrow down to the compost heap is a Black bear rooting around for food!
Best pallets for a composter:
The best pallets to use are ones that have been stamped with the IPPC or EPAL logo, plus the letters HT to signify that they have been heat treated. This means that there is no chance of toxic chemicals or critters getting into your compost.
Choose pallets of equal width so that you have no difficulty assembling them together – and it looks so much better!
Do not choose the cheap flimsy pallets that have blocks of compressed woodchip material as spacers instead of solid wood – they will just fall apart in short time.
Where it the best place to put a compost bin?
Compost matures better in an area of the garden that gets partial sunlight, and a free flow of air movement. This allows for maximum effectiveness of the composting process. Direct sunshine will only dry out the compost and prevent the microbial activity needed to produce great compost.
As a general rule a compost bin is put somewhere out of sight if possible, in an area that you do not use for planting as you do not want to take up valuable growing space with a compost bin.
Also it just makes sense to place it not too far away from the source material – usually your vegetable patch.
Summary:
The art of making good compost is a valuable skill for any gardener, especially perhaps for the vegetable grower.
Even if you are in an area with poor soil, the ability to produce good compost over a couple of years or so means that you can grow your own vegetables and plants where others fail.
Home-made compost represents a valuable free source of nutrients that can be re-created on an annual basis with just a little effort, and the results of your efforts will be an abundant food source for the family – and even the neighbors!
Personally I find that making your own composter with free pallets discarded by industry, just adds to the overall benefits of composting in general.
Happy composting!
Pick UP Our Composting Book On Amazon Here.. .
.
Recent Posts
Raised Bed Hugelkultur: The Smarter Way to Fill Raised Beds Without Spending a Fortune
If you've priced up enough compost to fill a new raised bed recently, you'll know one thing... It isn't cheap. Many gardeners are surprised to discover that filling a 2-foot-deep raised bed can...
What is a Hugelkultur Bed? A Hugelkultur bed is a raised garden bed built from rotting logs, branches, grass clippings, leaves, and soil. As the wood decomposes, it stores moisture, improves soil...
