How to sprout potatoes
Sprouting potatoes – a procedure called ‘chitting’. This is a common way to treat the potato tubers before planting them in the ground. This procedure is not essential before planting. But there are 2 main reasons why you should sprout potatoes before planting.
- Chitting potatoes encourages an early growth spurt and a subsequent earlier planting and growth of the potato when planted.
- The chitting procedure allows the gardener to maximise or control the crop yield to a certain extent by limiting the number of sprouts on the tuber itself.
To speed up potato sprouting there are 3 things which can be done to encourage this early sprouting.
- Place your seed potatoes in a not-to-dry place at a temperature of between 45-60F (7-15C) and lay them out in trays where they are exposed to indirect sunlight.
- To speed up the sprouting process, place onions or apples alongside the potato tubers. The gases released by the fruit encourages the potato to sprout.
- Keeping a moist rag or even damp leaves alongside them will also help stop the tubers becoming all wrinkled and dried out.
Do potatoes have to be chitted before planting?
The answer is no they do not. The potato will grow fine even if you just plant it before any shoots begin to form. Chitting seed potatoes simply speeds up the process somewhat. This allows for an earlier harvest.
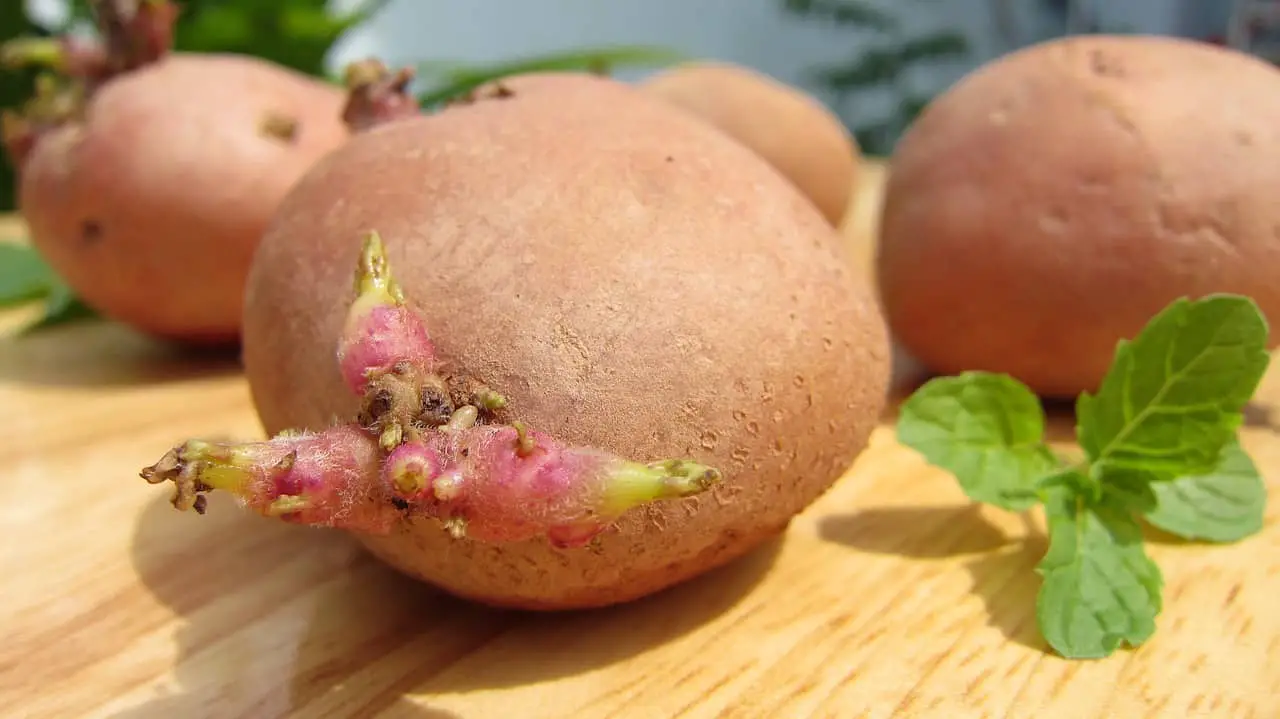
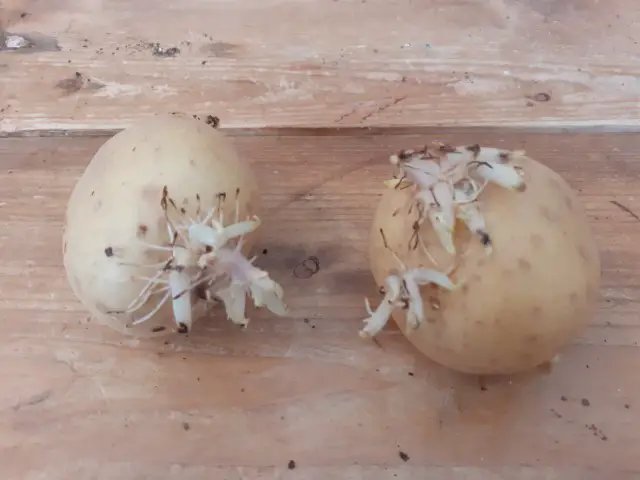
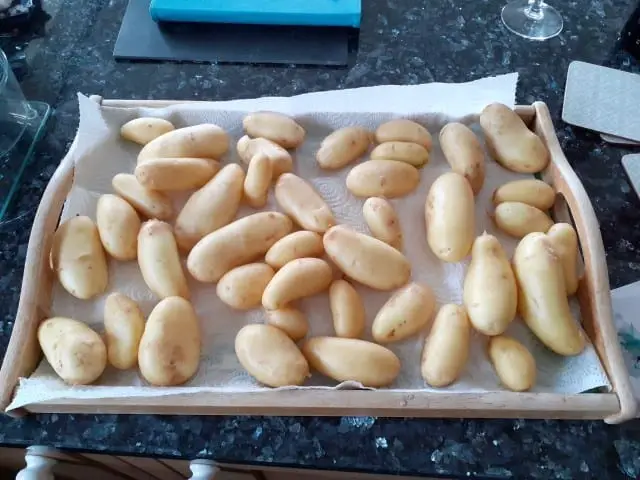
If you choose to sprout the potatoes before planting them. You will know when the seed potato is ready to plant when the shoots are about ½ to 1 inch long. This is the length when the shoot is strong and not so likely to break.
Sometimes the shoots can reach several inches long (this can happen if they sprout in a very dark place). This is not a problem. Curl around the shoots and plant as normal – you do not have to dig a hole 12 inches deep to accommodate the long shoots!
Choosing a low-light place to sprout your potatoes will ensure they have strong green sprouts. This will mean a good start when they are planted.
Preparing potatoes for planting
After the sprouting process has been completed you are ready to plant the potatoes. There is one more thing you can do. This will double or even treble the number of potatoes you have to plant, and that is cutting them up!
The fact is that a potato shaw will grow even if there is only 1 eye on the tuber. This means that if you have large potatoes, they are likely to produce multiple eyes and shoots. In this case you can simply cut the potato into 2 or 3 pieces. Be sure there is at least 1 eye on each piece, and plant your potato cuttings eyes upwards.
Keep in mind that if there is no eye on the cut potato then it will rot in the ground and not produce shoots.
 |  |  |  |
When to start chitting potatoes?
The best time to start the process is 4-6 weeks before you intend to plant them. This does depend on the current ground temperature. In cooler climates this is usually the beginning of January. With warmer climates from end of February onwards.
Take care to protect the tubers from frost damage while they are sprouting. Ground temperature should be over 45F (7.2C).
When the potatoes are ready to plant in the ground, cover them over with some garden fleece. When they start to sprout, this will protect them against cold frosty weather.
How to prevent sprouting seed potatoes from rolling around
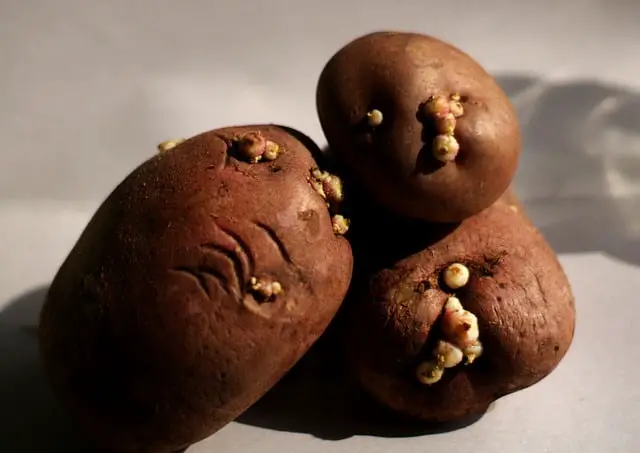
This is actually an important point. The last thing you want is for your sprouting potatoes to have the sprouts broken when rolling around on a work surface. Or just bashed and broken in a container.
Fortunately the answer is simple. Place your sprouting potatoes in empty egg cartons! This will keep them safe and steady therby preventing the delicate young sprouts from being damaged.
Planting early potatoes:
Potatoes are basically categorised in 3 ways. First early, earlies, and main crop. With this in mind you need to pick first earlies for your first potato crop of the season. For this reason also the fleece protection is advisable as described above.
Planting the potato is a simple matter of choosing your planting method. This could be planting in straw bales. Raised beds, square foot garden, or indeed a traditional garden method.
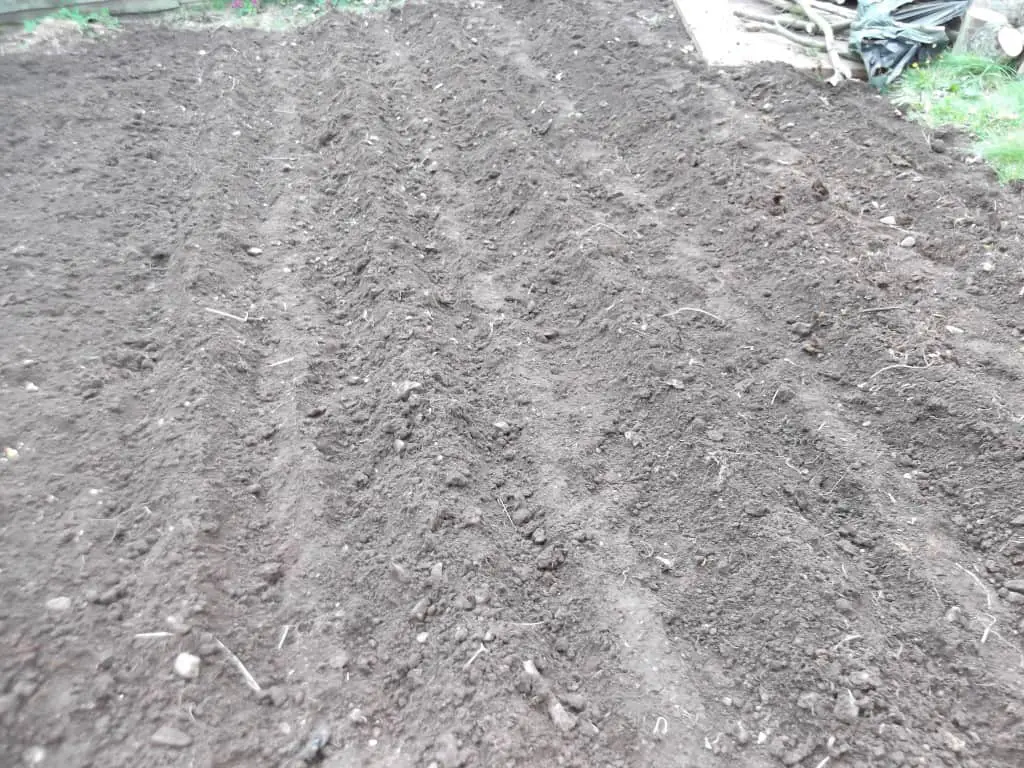
For a traditional row garden the process could not be simpler. After digging over the ground. Use a garden rake to remove stones and other obstacles. Score a trench about 3 inches deep along the length of the plot.
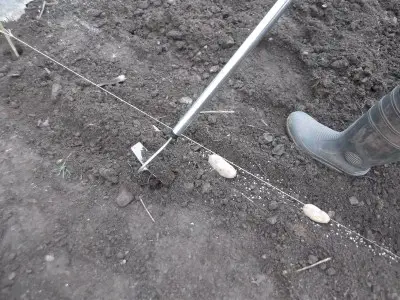
Repeat this in rows 18 inches to 2 foot apart until you have the area covered. Scatter along the row some general fertilizer. Then plant in your potatoes with the shoots facing upwards.
Cover the potatoes completely forming a little mound along the row. After the shoots come through, pull up more earth around them to partially cover the shoot.
This will create long rows of raised soil where the tubers will grow and be easier to harvest come the right time.
Keep a watch out for tubers protruding through the soil as they grow. Cover immediately should this happen with more soil. Failure to do so will result in green potatoes that are poisonous to eat and will have to be discarded.
Time to harvest potatoes?
First early potatoes should be ready for harvest 10-12 weeks after planting. With second early and maincrop varieties taking around 12-15 weeks. You can even pull up a few early tubers before this time. If you prefer small salad potatoes, especially with the early varieties.
With main crop varieties then you should wait until the flowers have developed. Then when the stalks begin to die away begin harvesting for the best results.
Check out these links to see other articles on growing potatoes. Growing potatoes in straw bales or potatoes in raised beds and square foot gardens. These are no-dig garden methods that are becoming increasingly popular.
Choosing potato varieties
This chart will show you a selection of popular potatoes that you might want to try out this growing season. Most first and second early potatoes tend to be salad potatoes. With main crop being larger varieties for baking, mash, or making fries.
| 1st Early | 2nd Early | Maincrop |
| ARRON PILOT | BRITISH QUEEN | DESIREE |
| EPICURE | CHARLOTTE | GOLDEN WONDER |
| EPICURE | MARIS PEER | KING EDWARD |
| CASABLANCA | VIVALDI | MARIS PIPER |
| DAKOTA ROSE | JAZZY | MAYAN GOLD |
| PENTLAND JAVELIN | NIKOLA | CHIEFTAIN |
| ROCKET | ARRAN PILOT | GOLD RUSH |
| RED DUKE OF YORK | LADY BALFOUR | PICASSO |
| SWIFT | KESTREL | PURPLE VIKING |

Recent Posts
Planting potatoes in the fall season ‘goes against the grain’ in many respects. This is because we tend to think of potatoes in 3 distinct types – 1st early, 2nd early, and main...
Growing Potatoes In A Square Foot Garden - My Results There are a great deal of different vegetables you can grow in a Square Foot Garden. In fact just about anything you can grow in traditional...
