Choosing whether to buy or choose between a Polytunnel or a Greenhouse, is a decision that confuses many, especially if they are new to gardening and the whole concept of growing plants in a greenhouse or polytunnel (also called a hoop-house).
For a gardener this is perhaps one of the most expensive decisions to make, and certainly ranks right alongside the sit-on mower or garden shed for expensive outlays – so it’s something you want to get right from the get-go!
Personally I have used both traditional glass-covered greenhouses and polytunnels, and I have to say that both of them have their merits, but I rank on the side of polytunnels overall. However that is maybe just me!
The fact is that whether or not a polytunnel or a greenhouse would suit you better is largely down to your expectations, and the overall budget that you have for as a general rule glass covered greenhouses are the more expensive option by far.
So to figure out whether a polytunnel or a greenhouse would suit you better, a quick look at the advantages and disadvantages of both structures would have to be examined.
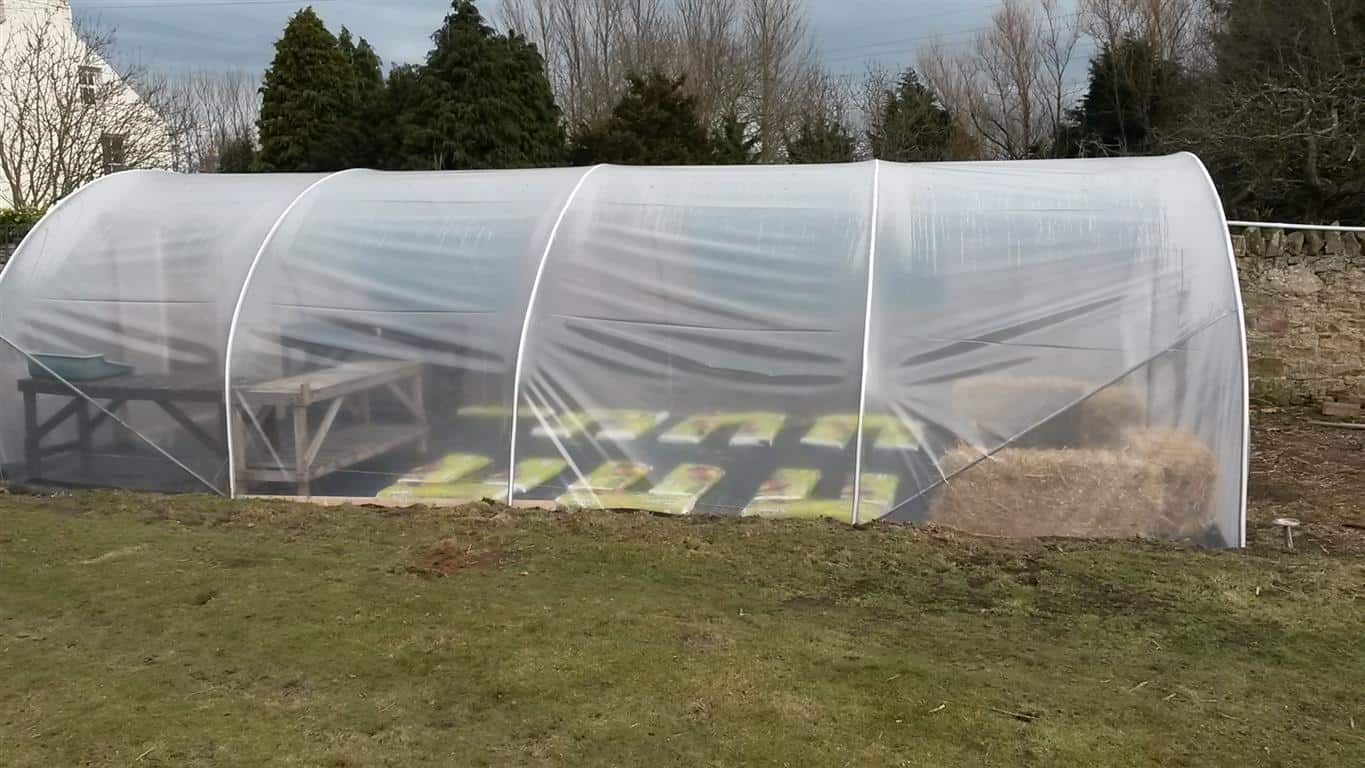
Advantages of a Polytunnel
- Polytunnels are economical: This is probably the biggest single factor that makes polytunnels a popular choice over the greenhouse, which can be 3-4 times more expensive for the equivalent size. A 6 foot by 16 foot polytunnel can be bought for around $600 where the equivalent greenhouse would cost around $2,200 – but very much dependent on the framing materials and finish.
- Choice of Coverings: There is a huge range of polythene coverings available from most polytunnel sellers. This can include thermal coverings, UV protection, anti-fog or condensation coverings. This is alongside various white, black and green covers. There is also a choice of thickness available with the most popular being 720 gauge (180 microns) which should last 5 years plus.
- Tougher? Todays polythene is surprisingly resilient and provided the frame is well anchored, can withstand quite severe weather conditions. The flexibility of the polytunnel can in fact be an advantage in strong winds where it will flex rather than break glass in heavy winds or indeed snow – which can be removed easily by lifting from the inside using a soft-bristle sweeping brush.
- Easier to ventilate: The polytunnel can come with a double door at either end, plus some can have the base polythene lifted to about the 3 foot height. This means that they are easily cooled down and opened for ventilation in super-hot conditions.
- Little maintenance: Unlike a traditional wooden greenhouse that has to have the frame painted regularly or it will rot, a polytunnel is completely enclosed so there is no painting required. Any cracks or splits in the polythene are easily repaired with a clear sticky tape.
Disadvantages of a Polytunnel
- Aesthetics: There is no doubt about it, the polytunnel is not as attractive to look at as the traditional greenhouse – especially the range of Victorian stylish greenhouses available today in timber or metal construction. If your location is visible from the front of the house especially, then the polytunnel is maybe not the best to look at – just sayin!
- Not as long lasting: The typical polytunnel covering will have to be replaced every 5-7 years on average. The actual metal loops will of course last many more years than this – but loops alone do not a polytunnel make 😊 This compares to a traditional glasshouse which will basically last a lifetime if it is well maintained.
- Easily damaged? This is questionable as both the glass house and the polytunnel can be damaged in different ways. Whilst you cannot ‘break’ polythene, I had a tunnel badly vandalised by someone with a sharp blade who thought it a good idea to run it along the length of my polytunnel. So yes, polytunnels are prone to damage just like greenhouses but in a different way.
- No automatic vents: Unlike a greenhouse which can be fitted with automatic opening windows to adjust temperature, a domestic polytunnel has to be ventilated manually by opening doors or lifting the sides.
So that is a quick summary of the advantages and disadvantages of a polytunnel vs a greenhouse. But what advantages or otherwise does a traditional greenhouse have over the polytunnel – if any?
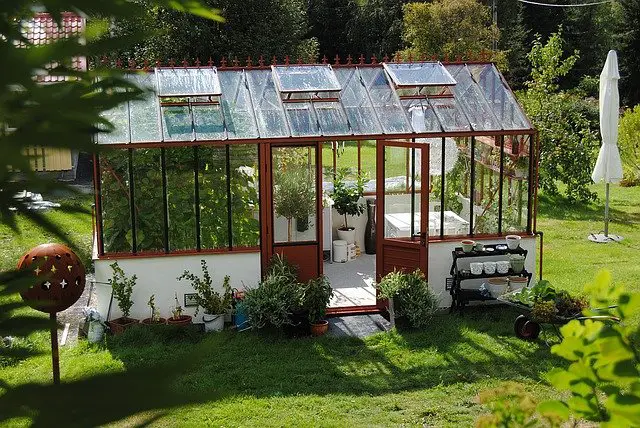
Advantages of Greenhouse over a Polytunnel
- Solid construction: Unlike a polytunnel, a greenhouse – especially one with a good timber frame – is a solid dependable construction that can easily last for the lifetime of the user if kept maintained. Choices of toughened or tempered glass will extend the potential lifetime of the greenhouse.
- Automatic ventilation: This option is available for a greenhouse and is basically a temperature control arm fitted to windows that allow for automatic opening when the temperature rises to damaging levels.
- Looks good: A good timber framed or even cast iron greenhouse is a classic construction that can even look good at the front of house – and be the envy of your neighbours!
- Lean-to greenhouse: A lean-to type of greenhouse is available that can really take advantage of a garden wall or even outbuilding – and is cheaper than a full greenhouse structure.
- Built in accessories: Most Greenhouses come with optional accessories such as potting tables, staging or shelving. These can be fixed to the frame and form a valuable addition to the whole Greenhouse experience. No such option is available for Polytunnels.
Disadvantages for a greenhouse vs a Polytunnel:
- More expensive: There is no doubt about it that the cost of a greenhouse is compared to an equivalent sized polytunnel is much higher. This can make the greenhouse a no-go for many with a limited budget.
- Difficult to construct? This is a little questionable as both structures need a degree of expertise when it comes to construction. However the greenhouse is perhaps the more difficult of the 2 as it will need a level pre-prepared base to work from, and in some cases a foundation for a dwarf wall.
- Damage potential: Of course the fact is that a glass covered greenhouse is prone to glass breaking by falling branches, wind damage, thick snow, accidental and/or deliberate damage to glass. Unlike a split in a polythene tunnel, broken glass is dangerous and a real hazard amongst the plants!
- Maintenance: This is especially the case for timber framed Greenhouses as they need the timber painted regularly, and the putty replacing on an on-going basis.

So what is best – a polytunnel or a greenhouse?
The best choice is actually the one that suits your own circumstances, be they economic, practical, or indeed aesthetic. The traditional greenhouse looks better, but the Polytunnel is more economical overall especially if you are just looking at the short term.
Creating a base for a greenhouse
A Greenhouse is usually built of a solid base of either concrete of concrete slabs – if it has glass all the way to the ground. Some Greenhouses however have the glass that will start a couple of feet from the ground and these are usually built on what is called a dwarf wall made from common brick or blockwork.
Creating a flat slab base is simple if you follow these steps.
- Measure out the area needed for your Greenhouse
- Level the area where you are building by clearing away any grass down to below root level.
- Fill this with a course concrete sand and level off with a builders level
- Start laying your slabs in one corner, levelling and tamping down the slabs as you go until your base is complete.
This method will leave your slab base slightly above ground level – which is what you want to avoid water seeping back into your Greenhouse from outside.
You may choose to leave a ¼ inch gap between the slabs and fill with a sand/cement mix if you prefer. This method is sometimes chosen for those who struggle to get the slabs exactly flush to each other, and it also is better for preventing grass growing between the slabs.
With a dwarf wall construction it will be necessary to dig out a foundation at least 18 inches (450mm) deep and pouring a concrete base 4 inches (100mm) deep to build your wall on. Yes you can get away with less depth but this will give you a good base and 1 that will withstand a severe frost.
The wall itself can be built with concrete block – but this will have to have a finish of some sort to make it look good and protect the block from frost.
Common brick on the other hand looks good and traditional, and it will also weather well and withstand frost.
I will admit that some building skill is necessary for this work, so you may have to ‘hire in’. But this is the case with just about everything in life. On the other hand – YouTube videos are an excellent resource for this kind of work!
Creating a base for a Polytunnel
A Polytunnel is a simple hoop frame that needs no base as such, however it does require some work to install it. This varies depending on the manufacturer but usually follows this format…
- Measure out the area you need for the Polytunnel and mark the corners exactly.
- Draw a line between the markers and dig out a trench about the width of your spade and about 1 foot deep.
- Sink your framework into the trench at the advised spacing.
- Pull over the Polythene over the entire length of the structure. Pull on the length and secure 1 side only by stamping polythene down into the trench and covering over with the soil you previously removed.
- Pull down tight from the other side, starting from the centre and working your way down the length, stamping and filling in as you go.
- Construct the ends according to your design and the manufacturers instructions.
This is the basic steps to constructing a typical Polytunnel. Some however do not require you to dig a trench but instead have the framework secured direct on the surface with the polythene fixed to a base bar that surrounds the structure.
Check out the manufacturer or seller to see what they have on offer before you make an informed choice of Polytunnel.
As for the interior of the Polytunnel. If you have built the frame of grass then it is best to turf this out first of all and cover with a light coat of concrete sand. Cover over with a good quality woven landscape fabric to finish. This will give you around 4-5 years of wear if you treat it well.
Alternatively you can turf it out and lay out the whole area in concrete slabs as in the instructions above. This will certainly give you an excellent base that will last for decades!
Gravel volumes for a Greenhouse base
There is a simple calculation when it comes to the amount of gravel of sand infill you will need to cover any area. 1 bag of crushed gravel at 55lbs (25kg) spread at 2 inches (50mm) thick will cover an area approximately 0.25 mtrs square. It will take 4 bags will cover 1 square meter when spread 50mm thick.
A simple calculation is to take the size of your greenhouse, for example 3 x 6 which equals 18 square mtrs. This means you will need 72 bags of gravel if you want to spread it 50mm (2 inches) thick
| Base Dimensions | Calculation Square mtrs | Thickness In millimetres | Material In bags |
| 2 x 3 | 6 | 50 | 24 |
| 3 x 4 | 12 | 50 | 60 |
| 3 x 6 | 18 | 50 | 72 |
| 3 x 9 | 27 | 50 | 108 |
What is hotter – Greenhouse or Polytunnel?
There seems to be a lot of controversy over what is the hottest of the 2 structures, however from my own experience I can say absolutely…it depends!
The fact is that if you close up both Greenhouse and Polytunnel so there is no air escape, and both have clear glass or polythene (nothing ‘special’), then the Greenhouse is hotter by several degrees. Why is this? Well I can only assume it is due to the clarity, thickness, and magnification effect of the glass, over the polythene sheeting.
However, when it comes to cooling down the interior of both, then the Polytunnel with an open door at each end creating a through-flow of air, has the advantage when it comes to bringing temperatures down to the ideal 85F (29.4C) mark that is best for growing tomatoes for instance.
The Greenhouse is usually vented by windows in the roof and sides of the framework, and the actual opening is almost always not wide enough for really hot days – even with the door open.
The fact is however that the question over what is hotter is not as important as what is the best ventilated. Both structures have the ability to create massive heat, yet all you really want for most plants is around 85F.
Plants in a Greenhouse or Polytunnel can both suffer from mould or mildew, and insect infestation if there is not a sufficient free flow of air around the plants.
This means that the ability to protect your plants from extreme heat with shading or ventilation is the most important factor especially over the hot summer season – more important I dare to say that what is the hottest.
Summary of Polytunnel Vs Greenhouse
I hope that this article has helped when it comes to deciding on a Greenhouse or Polytunnel for your project. The actual answer to the question as you can see, is not eaxctly straightforward!
The bottom line is that only you can decide which is best for you, after taking into account all the varying circumstances. That is what will ultimately determine your best course of action.
Best of luck!
Recent Posts
Whether you are growing plants in a greenhouse, hoop-house or Polytunnel, the fact is that there are many advantages that square foot gardening in a greenhouse has to offer over traditional gardening...
Thinking of growing in a polytunnel ? Polytunnels are the kind of thing that can create revulsion or joy, depending on your temperament ! The fact is however that growing in a polytunnel can be...