Growing Vegetables In Straw Bales (2)
Now that we have looked at the ‘why to’ it is time to look at the ‘how to’ part of growing vegetables in straw bales – setting up your Straw bale for planting out.
Apart from the obvious question as to what you are going to plant in your veggie garden – there are 4 main steps when it comes to actually going about the business. They are location, the bale type, conditioning, and planting.
Each of these steps will be looked at in greater detail in the following chapters step by step, to help you avoid ‘rookie mistakes’ and get the most productivity out of your efforts.
Step 1- Straw Bale Location:
When considering where exactly to put your SB garden, then the thoughts regarding sunlight, and shelter from adverse elements are very much the same as with any other vegetable garden.
In order to grow well, most vegetables need a minimum of 6-8 hours sunlight. They must have adequate water and nutrients for their needs, and shelter from strong damaging winds – especially in the case of climbers or tall plants such as sweetcorn or tomatoes.
Other considerations would be the source of water. You do not want to have to lug pails of water over a long distance, especially in the beginning stages of a SB garden – as you shall realise in later chapters.
Water for any plant is best gained through a water butt or even nearby stream or pond, if you happen to be so lucky! The reasons for this is that it is generally warmer, so will not shock the plants.
Consider also that mains water is purified or made suitable for human consumption by the addition of many different chemicals such as calcium hydroxide, sodium hydroxide, fluoride, potassium permanganate, chlorine, sodium bicarbonate, algaecide, and clarifiers to name just a few!
These may (or may not) be advantageous for us humans, but plants definitely prosper better with untreated rain water, so this is top choice if it is available to you.
Growing in straw bales, as with all vegetable gardens, another consideration may be the accessibility via the kitchen door! The kitchen is after all likely to be the ultimate destination for your fresh vegetables and so if you do not have to travel far to get your fresh carrots for the stew, then all the better.
Maybe not a major consideration, but it’s something to think about none the less.Try not to place you bales under overhanging branches from trees or bushes – just as you would with any vegetable patch really.
Many trees produce copious amounts of sap that may contaminate your bale as well as your vegetables, as well as drop insects and possibly disease amongst your plants.
If you are using a tree for its shade value in a hot climate, then you must consider the pros and cons of such an arrangement. It may well work out fine for you if all else is acceptable regarding the plants you are considering versus their particular requirements.
The bale can be placed alongside a wall or fence with no problem, provided it is getting adequate direct sunshine – without getting roasted!
In fact if you are growing climbers such as tomatoes, peas, beans, cucumber etc, then a wall or fence gives you an immediate advantage when arranging for support.
Be aware that once you have set the bale in place, then it is unlikely that you will be able to move it at all, especially after the first few weeks when it is starting to decompose.
That, and the weight of a SB when soaked in water, means that wherever it is set-up, that is where it will stay till the growing season is over at least.
The exception to this general rule would be if you had your bale set up on a mobile platform of some kind. Even an old wheelbarrow would enable you to move it around the garden to get the best of the light or other conditions.
Step 2 – Bale Type – Straw or Hay?
Amongst the advocates of SBG this question perhaps causes the most controversy or consternation. The fact is that there are benefits as well as advantages to both types of bales and each should be looked at with due consideration.
First of all, especially if you are not familiar with the ‘country ways’ – what is the difference? In a nut-shell, Straw typically come from the harvest of barley, wheat, oats or rye. This is usually used for bedding animals.
Hay bales on the other hand consist of grass that has been grown to produce feed for the animals over the winter. This is harvested, dried, and set into bales for storage. Sometimes it is mixed ‘wet’ with molasses to enrich the feed and sealed in a large round polythene bag to create silage.
Things to Consider:
Basically what we have to consider when using either of these bale types for our growing plants, is exactly what each of them ‘brings to the table’ with regard to advantages or disadvantages.
Straw have the immediate advantage over hay in that you will not get a crop of weeds with a SB, whereas if the hay has been harvested late in the season then it will be full of grass seeds – which will sprout as soon as you begin the watering process!
However on a negative note – straw have no immediate nutritional value, whereas hay bundles consisting of grass have an immediate nutritional value being high in nitrogen, potassium and phosphorus. This is released through the composting process and adds an immediate benefit for the vegetables.
This apparent advantage is however not as good as it seems, for simple watering with nutrients should add all the benefits that the virgin Straw bale lacks.
In my experience SBG’s are not so greedy when it comes to watering them, whereas hay bundles need constant attention to prevent them drying out completely.
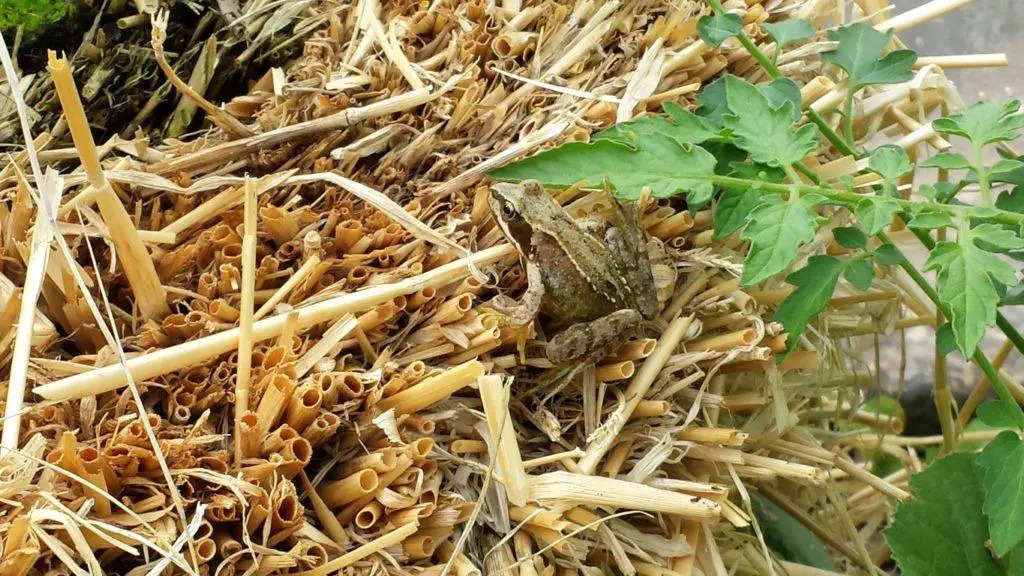
This could simply be down to the fact that the straw creates good hollow tubes that keep the water longer, where hay is narrower and more densely packed during the baling process. This could mean that a hay bundle is more resistant to watering, and holds less water overall.
This however is not an ‘absolute’ as many things including your own climatic conditions play a part with regard to water retention or indeed consumption.
Bottom Line?
The problem with weeds is perhaps my main objection to using hay bales, after all how am I to know when the farmer baled the hay? If indeed it was after the seeds had formed, then I will spend the growing season stopping a lawn growing amongst my vegetable patch!
Add to this the fact that hay is generally around twice the cost of straw, and a bale of hay weighs much more (yea I’m an old skinflint!). So my own preference is for straw, but if you want to try hay then that’s just fine – just make sure the grass cutting shears are kept handy (smile).
I will admit however there is another way to keep weeds under control if you have chosen to use a ‘seedy’ bale of hay. Simply wrap the sides and top of the bale with a weed suppressant fabric. Allow a space for you plants to go through on top, as you would normally.
As an addition, I would recommend in this instance to run a perforated hose under the fabric to water the bale evenly during the growing season.
Step 3 – Bale Preparation:
Now comes the real ‘hands-on’ part of this gardening technique – setting out the bales of straw to grow in.
Once you have identified your location the bale has to be properly set-up and primed in order to receive your plants. It is not (unfortunately) a simple matter of dumping the bale on the ground and shoving in your vegetables, then sitting back to behold the results!
Ground Surface:
The first thing to consider is the ground itself. If it is covered in weeds or grass, then you should lay down a weed-membrane either fabric or – better in my mind – a couple of layers of cardboard.
The reason this is important is getting back to the previous chapter on controlling weeds. If you just dump the bale down on top of weeds or grass, then the chances are that some of the weeds will grow straight up through the bale over the season.
With regard to fabric or cardboard covering. Both will do the job of suppressing the weeds, however the cardboard has an added bonus in that it will slowly decompose and with the help of worms (who just happen to love cardboard and paper), will eventually be composted and integrated along with the bale itself.
A win-win situation really as you will have excellent material at the end of the growing season to add to your composting bin.
Another option is to turf the area where the bale is to sit down to 3-4 inches, and then sink the bale inside this area. This has the advantage in that depending on your water situation or local climate, the bale can draw water direct from the soil helping to prevent drying out.
Also the fact that the bale is in direct contact with the soil and all the beneficial worms and microbes, means that the composting effect is slightly accelerated overall.
However the beauty of this concept is that if you only have a concrete or other hard surface available, you can still plant out your SB and get excellent results!
Setting up – Conditioning A Straw Bale:
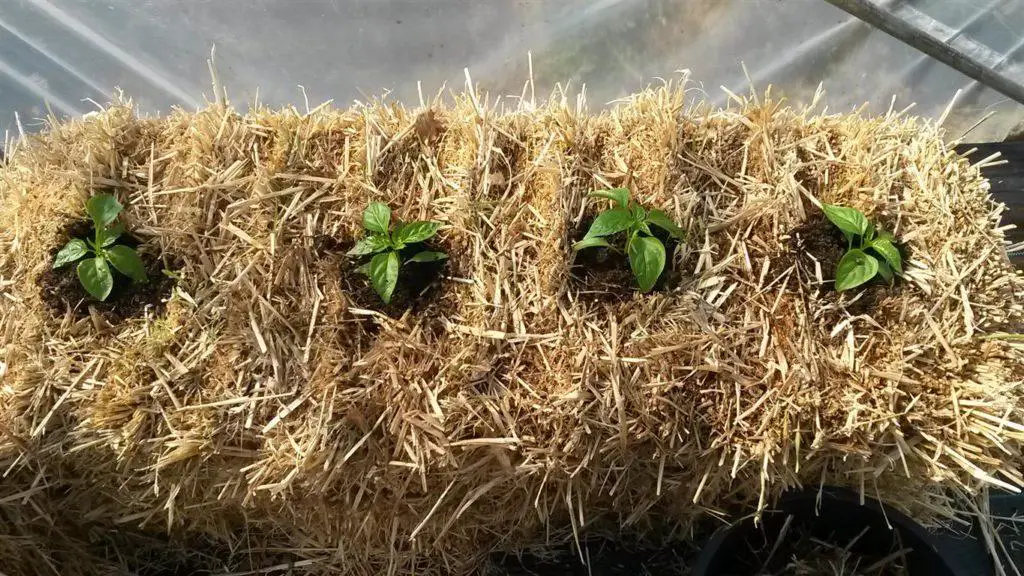
When placing the bale itself, it is important that it is arranged cut side up, or on edge. This enables the water to seep right to the inside of the bale and begin the ‘cooking’ process.
If you inspect the bales you will notice that one of the two cut sides consists of folded straw and the other is clean-cut straw? This clean-cut side is the one that faces upward.
This allows the water and fertilizer to run down to the inside of the bale and remain trapped. It is not a complete disaster if you get this wrong, but the bale will tend to dry out quicker as it will not hold the water as efficiently.
The 2 strings that hold the bale in place should be running along the sides. It is important that you leave these strings in place – for obvious reasons!
This ‘cooking’ is where the bale begins the process of decomposing and thereby producing heat in the inside of the bale, which in turn breaks down the straw and prepares it for your plants to benefit.
Once you have the bale in place then you must feed and water it to begin the process. Feeding is very important as the SB itself is mainly just carbon (hay differs as per the previous chapters) , and your vegetables will need a good mixture of nitrogen and potash to develop fully.
This feeding can be achieved in several ways. Either through conventional fertilisers or store-bought organic fertiliser or (my preferred method), home-brewed organic feeds.
The store bought nitrogen-rich feeds should be spread over the bale at the beginning and watered in. Thereafter added to the water itself is often best before the bale is soaked.
Organic home-brew is simple to make and apply. Preparation should be done a few days before you are ready for the bale.
Add a few good handfuls of grass, stinging nettles, or borage which has been cut into pieces, to a pail of water. Weigh it down with a heavy stone or brick, then leave for 7 days to infuse.
The resulting liquid can be diluted at roughly 1 part feed to 10 parts water, then applied to the bale. The remaining liquid can be topped-up over the season with more plant material and water, and applied as necessary.
Compost feed can be produced by taking a few handfuls of compost and adding to water and left to infuse as previously described.
Manure feed is especially rich in nitrogen which your veggies will love, however it is the ‘stinky’ option! To make this tea place a shovel of manure (horse, sheep, rabbit chicken, or goat is ideal) into a hessian sack and put inside a deep pail of water for 5-7 days.
Squish the sack up and down a bit before removing from the pail (you can add it to the compost heap). The resulting tea should be watered down about 15 parts water to 1 part tea.
Be aware however that using fresh manure does carry an element of risk with regard to E.coli and other harmful bacteria and worm larvae that may be present.
With that in mind do take precautions when handling fresh manure, or alternatively (and safer) use well composted manure that has been composting for at least 1 year.
Also, do not use manure compost on any low-ground vegetables that may come into direct contact with it such as cucumber or courgettes for instance.
Fish meal, bone meal and seaweed also are great sources of nitrogen, potassium and other nutrients that will benefit your vegetables.
Priming The Straw Bale:
The actual process of priming your bale should be done in the following sequence..
Day 1: Soak the bale completely with water infused with nutrients, or prepare the bale by scattering some store-bought fertiliser over it before soaking.
Day’s 2-5: Continue with the soaking and feeding process. Monitor the internal temperature with a thermometer (a compost or meat temperature probe is ideal), and watch for the rise in temperature as the ‘cooking’ process begins.
Day’s 6-14: Water every alternate day, checking to see that the bale does not dry out. As the process of cooking out comes to an end, the bale will cool down to reflect a temperature just a little higher or equivalent to, the ambient external temperature.
This means that the bale of straw is ready to plant. If the reading is still high then wait till it drops before attempting to plant, otherwise it will be too hot for the roots and the plant will likely suffer a premature death!
Step 4 – Planting Out The Bale:
Now that you bale has ‘cooked out’ and the composting process has begun, you are ready to plant the vegetables of your choice.
There will be more details regarding the individual vegetables and their growing needs in later chapters, for now however we shall look at the steps to be taken in order to get the best out of your bale.
Plants or Seeds?
The first decision is whether you intend to plant young developed plants, or plant direct from seed. Either way is possible for your SB garden, but the process differs as per the instructions below.
Planting from seed is possible by covering the flat surface of the bale about 2 inches deep in a good potting compost. This should reach to about 2 inches from the edge of the bale itself.
Once this is done then simply poke a hole with your finger at the spacing’s needed for your seeds, and place the seed in the holes. For small seeds such as onions, then sow sparingly in rows as you would in a conventional garden.
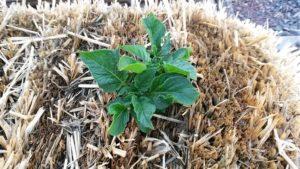
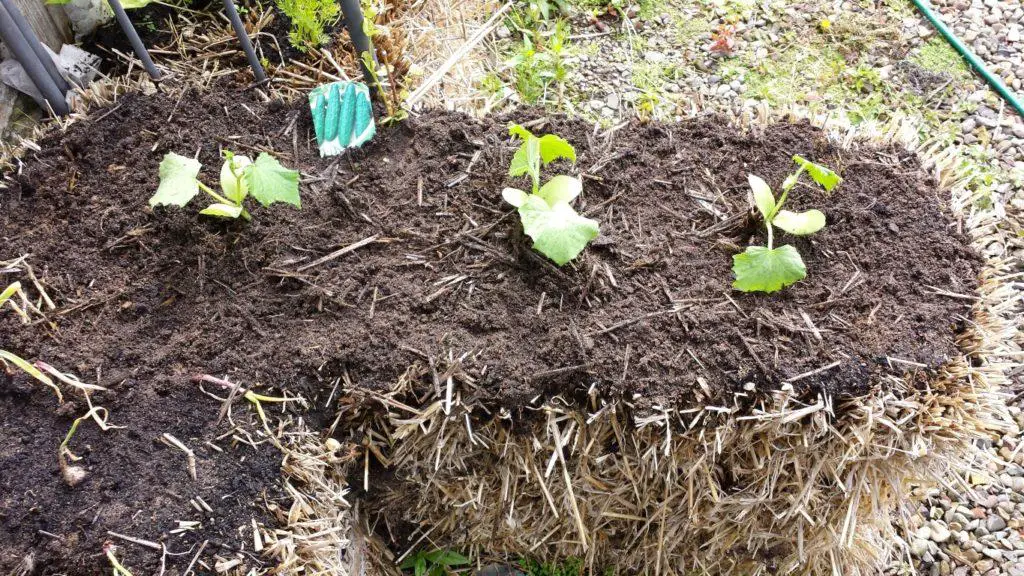
Planting young seedlings is a simple matter of chopping into the bale and digging out a suitable area (usually 4-6 inches deep and 3-4 inches across) and after removing your plant from its pot, placing it in the hole. Firm around with more good potting compost before watering thoroughly.
Stand back and admire your work!
Feeding: Although the bale should by now be thoroughly infused with nutrients thanks to your feeding efforts, your plants will need further feeding especially when they begin to produce fruits or otherwise mature.
Once per week with your organic tea should be adequate for most vegetables. With a heavy crop of fruiting tomatoes however, I would increase the dosage to twice per week
Part 3 – Straw Bale Planting Tips & Techniques…
Pick up the ebook here…
Recent Posts
What is a Hugelkultur Bed? A Hugelkultur bed is a raised garden bed built from rotting logs, branches, grass clippings, leaves, and soil. As the wood decomposes, it stores moisture, improves soil...
Has your philodendron turned into a leafy monster? Whether it’s climbing up the curtains or spreading across the patio, large philodendrons can grow out of control fast. The good news...